
Connect Claude Desktop via OAuth
Connect Claude Desktop to your WordPress site using OAuth. Before you begin, make sure you have Claude Desktop installed, a WordPress site with Imagify and MCP support enabled, and a WordPress administrator account.
Step 1: Add a custom connector
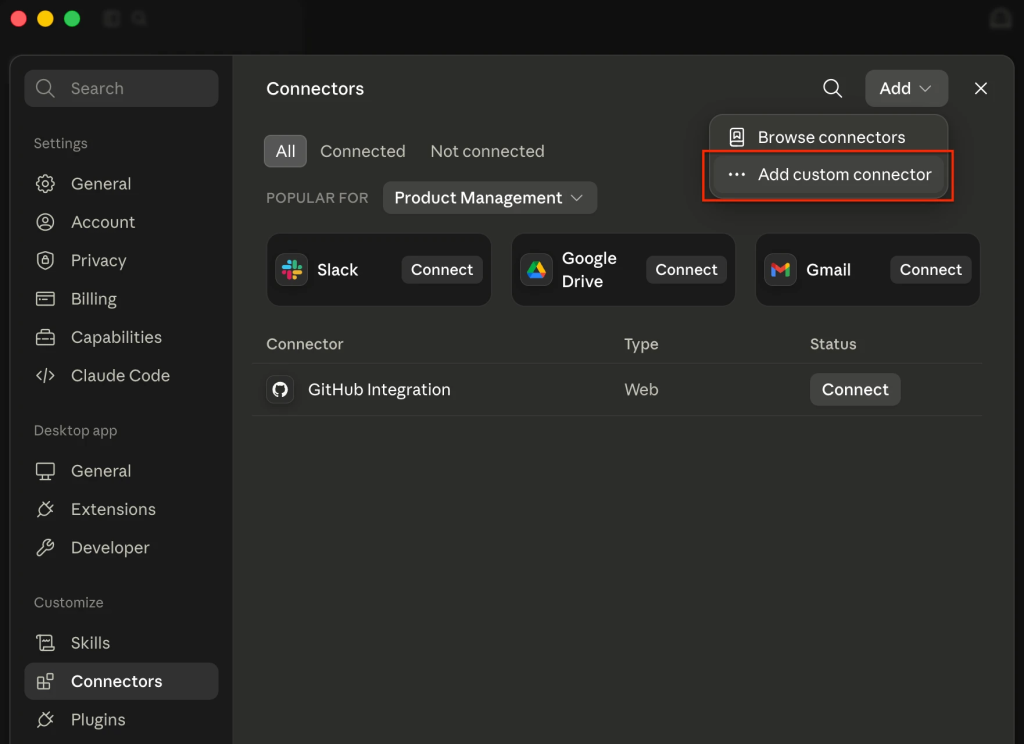
- Open Claude Desktop
- Go to Settings → Connectors
- Click Add and select Add custom connector.
Step 2: Configure your connector
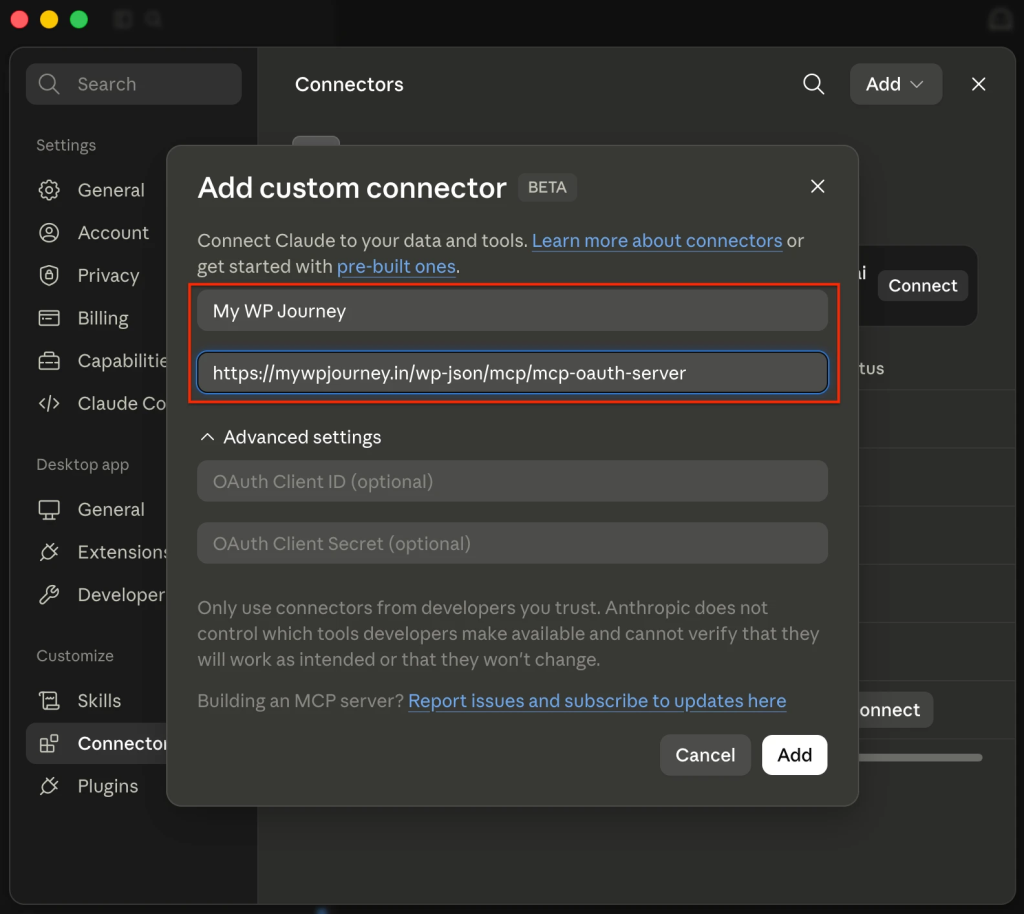
- Enter a name for your connector, such as your website name.
- Enter your WordPress site’s Remote MCP server URL.
Replace your-website-domain with your own WordPress website address.
Example: https://your-website-domain/wp-json/mcp/mcp-oauth-server - Leave the OAuth Client ID and OAuth Client Secret fields empty.
- Click Add.
Step 3: Connect to your WordPress site
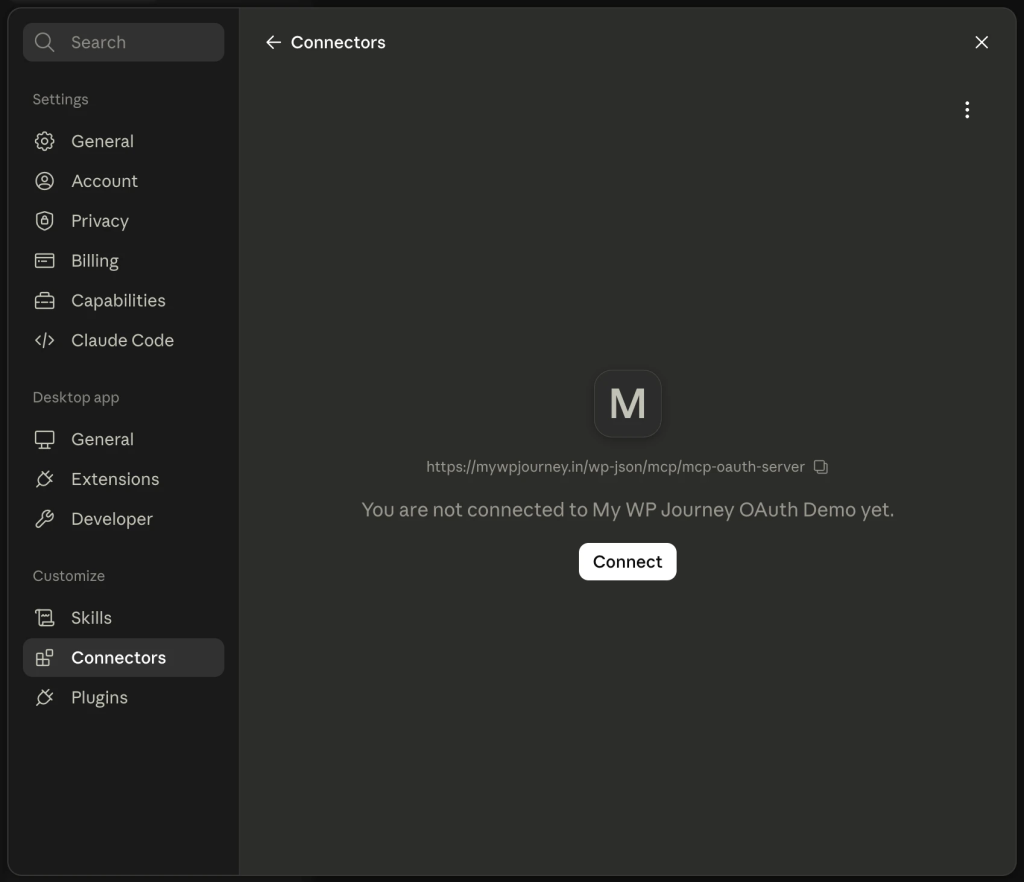
- Select the connector you just created.
- Click Connect.
Step 4: Authorize Claude Desktop
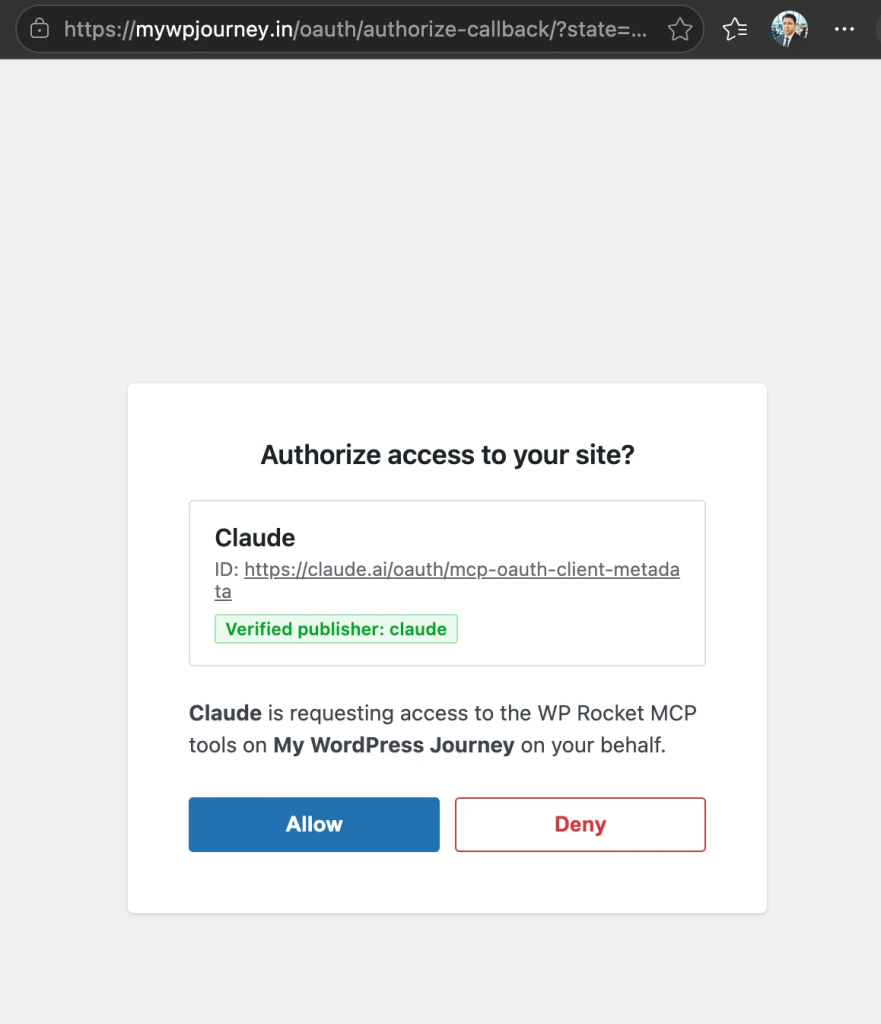
Your default web browser will open.
- Sign in to your WordPress administrator account if prompted.
- Review the access request.
- Click Allow.
Note: If you’re already signed in to WordPress, you’ll be taken directly to the authorization page.
Step 5: Verify the connection
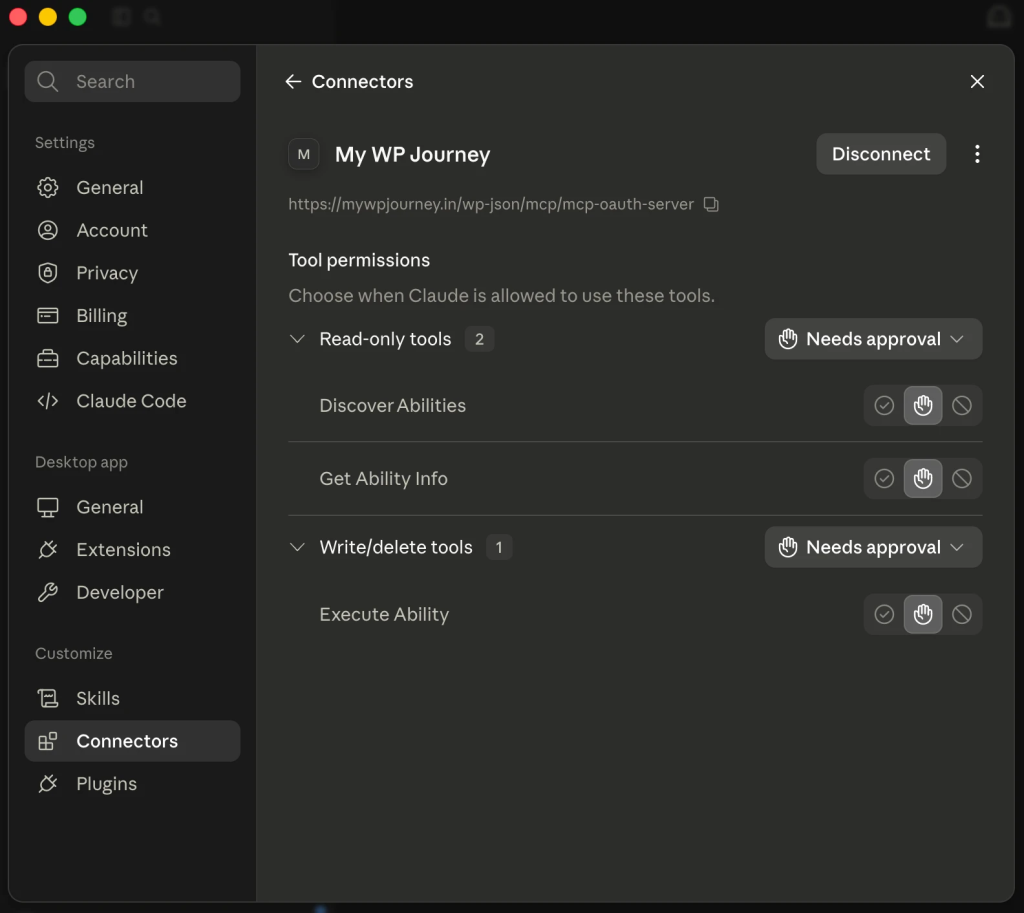
Claude Desktop is now connected to your WordPress site and ready to use with the available MCP tools.
- Open a new Claude conversation and ask:
What MCP tools are available from my WordPress site?
Claude should display the available WordPress and Imagify MCP abilities associated with your website.
Next Step
Return to the Connect Imagify with AI Assistants guide and continue with Step 3: Get started to explore example prompts and available MCP abilities.
 Great! Glad we could help!
Thanks for your feedback
Great! Glad we could help!
Thanks for your feedback
Your feedback has been sent to our team We value every bit of feedback we receive as it helps us to improve our products and services. Thank you for your time.