Looking for an efficient way to convert your images to WebP and…
This is a guest post. Opinions and recommendations are the author’s own.
If you want to make your website more visually appealing, images are a great way to do it.
But finding the right images can be a challenge. You don’t want to use just any old image – you want high-quality visuals that will complement your content and appeal to your audience.
Why You Need High-Quality Visuals
Visuals can make or break a website – they can draw viewers in and keep them engaged or be an unwelcome distraction. That’s why using high-quality visuals is important when creating your online presence. Visual marketing uses compelling imagery to convey your message and draw attention to your brand. Whether designing graphics for social media posts, crafting attractive product photos for eCommerce, or selecting images for blog content – having stunning visuals will take your site from average to exceptional.
7 Ways to Get Images for Your Website
1. Free & Paid Stock Images
Many websites offer royalty-free stock images that help you get professional-looking visuals without creating them from scratch. Unfortunately, they come with no copyright restrictions and provide many options.
Unsplash, Pixabay, and Pexels are arguably the best site for pictures. They function as a place for creators worldwide to showcase their work and as a source of high-quality images for those who look for them. These stock libraries have mostly free photos for download and paid subscription options that provide access to more photos. In addition, paid stock images offer more flexibility when finding the perfect image for a project.

Pros:
- A wide variety of images sources to find them
- Most stock images are free to use
Cons:
- It can be used in multiple projects and may look repetitive
- It can be time-consuming to search for the right image
- Different sources can vary in their usage rights policies, so you have to study them first
This works best when you need a quick image to fill up some space or use as a placeholder. However, if your visuals require unique and creative design, there may be better options than stock photos.
2. Creative Commons Images
Creative Commons is a nonprofit organization that offers a range of licenses that allow for different levels of use of copyrighted material. These licenses range from allowing any use with no attribution to only certain uses and no changes. The most popular type of Creative Commons license is the Creative Commons Zero (CC0) license, which allows users to copy, adapt, or distribute images – even for commercial purposes – without requiring author consent. Other Creative Commons licenses include Attribution (CC BY), Attribution – Share Alike (CC BY-SA), and Attribution – No Derivative Works (CC BY-ND).
Some popular websites that offer Creative Commons images include Wikimedia Commons and Flickr. Another way to find CC images is via Google search. Type in your request in the search bar, and filter by images. Next, click Tools – Usage Rights and tick the Creative Commons licenses option. The results page will show images from various stock libraries and Wikimedia, so you can choose the ones that fit you.

Pros:
- It shows results across multiple websites at once
- Free to use and modify
Cons:
- It may be of lower quality than paid stock
- You cannot be 100% sure the picture is CC0
- The choice may be limited for some niche-specific requests
It works best when you need a free image and do not require intricate visuals. Check the license details first if you want to use the image for commercial purposes.
3. Images Created by an Illustrator
Hiring a professional illustrator is one of the best ways to get great visuals for your website. Not only are these images unique and tailored exactly to your needs, but you can also be sure about their quality and copyright status. If you don’t have the budget to hire a designer, many websites like Fiverr and Upwork allow you to find freelancers to create images for your project at a reasonable price.
Pros:
- High-quality, unique images designed specifically for your website
- No copyright issues or restrictions on the use
Cons:
- It can be expensive, depending on the designer’s wage
- It may take time to find the right illustrator
It is the perfect option when you need unique, high-quality visuals that cannot be found on stock image websites. They also help convey an idea or emotion that requires an intricate visual representation.
4. Own Photographs
If you have the budget and resources, you can always use photographs on your website, either taken by you, a professional photographer, or a skilled team member. This can be a great way to add a personal touch and ensure that your visuals match the look and feel of your website.
However, this method requires more time and work, as you must have the pictures edited. For example, if you hire a professional, you may not worry about this part, as it should be included in the package. If you choose to take and edit the pictures within the team, you can look at various editing software suites – Adobe, Movavi, Cyberlink – fitted for different levels of experience.

Pros:
- High-quality, unique images tailored to your needs
- No copyright issues or restrictions on the use
- Can reflect the brand’s identity in an authentic way
Cons:
- It requires additional resources for taking photos or hiring photographers
- It takes more time to arrange photo shoots and edit images
- Results can vary depending on the skills of the photographer
This option works best when you need to capture a specific scene or idea or to represent your company’s visual identity thoughtfully.
5. Software Screenshots
Regarding digital products or services, you should take another approach to product images. Software screenshots are a great way to show off features or explain processes in an easy-to-understand and visually pleasing way.
Most operating systems have built-in screenshot tools, while some specialized programs like TinyTake and Lightshot offer more advanced options.

Pros:
- Easy to create and mostly free
- Perfect for showcasing the software or explaining how to use it
Cons:
- Not suitable for general visuals, only for digital products or services
- It may require additional editing to make it look more professional
This option works best when you need to demonstrate the features of your software product. It is also great for tutorials and other explanatory content.
6. Infographics
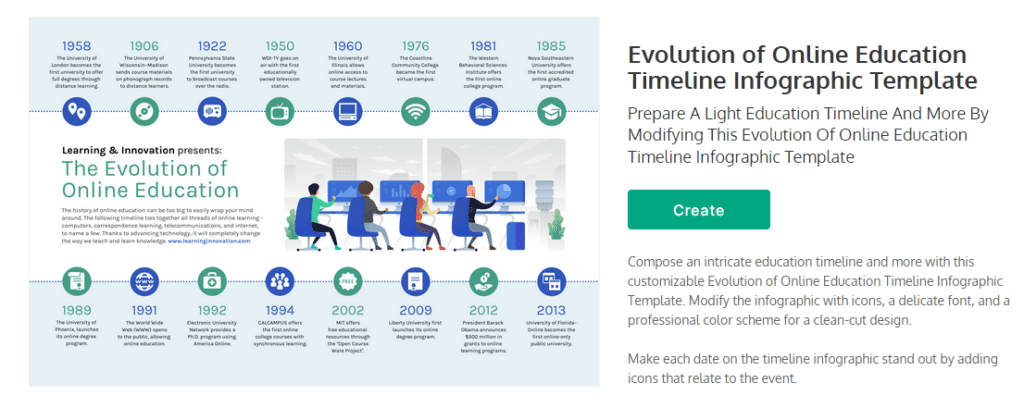
Infographics are great visual resources if you must convey complex ideas in an easy-to-understand format. They use clip art pre-made images that can be easily edited and customized and then used for data visualization to make complex topics easier to understand.
Infographic templates can be found on websites specialized in these kinds of visuals, such as Canva or Venngage. They usually require a registered account, but they also give you all the tools to design your own infographic from scratch.

Pros:
- Don’t require specific knowledge to produce
- It allows you to present complex ideas in a visually engaging way
- It can be used for multiple purposes, such as studies, reports, and more
Cons:
- Some of the templates and clip art are often hidden by a premium subscription
- Require actual research to have the data to present
This type of visual works best when you need to explain complex topics or data, usually for educational content. They can also be great for marketing materials that require the visual representation of statistical information.
7. AI-Generated Images
You can turn to AI-generated images if you need visuals and more than the above options. Artificial intelligence is storming up the internet in all its variety – from chatbots to image generation processes, allowing websites like DeepAI and Nightcafé to generate one-of-a-kind photos.
AI art generators process the command you type in and create a picture from the text. This means the more exact your input is, the better the output. However, it may take several tries before you get what you want.

Pros:
- Highly customizable and one-of-a-kind visuals
- It can save time with automated image generation processes.
Cons:
- Higher cost than other options, if used long-term
- The images don’t always look very realistic.
- Results can be unpredictable and not as desired.
This option works best when you have a specific idea that is hard to find in stock photos or need a picture with very specific parameters. However, AI-generated images may need more authenticity and realism than other options.
Which Way Is For You?
Regarding visual content, there is no one-size-fits-all solution – what works best for you will depend on your needs, budget, and resources. Knowing your target audience and the message you want to convey will make it easier to decide where to get images for your website. And remember, you don’t need to limit yourself to just one source! Combining different options might even get you better results.
Tips for Making the Most of Images
No matter which types of visuals you use, there are some key ways to ensure your content looks great. Here are a few tips to help you:
- Be aware of copyright regulations. Respect intellectual property rights when using stock photos or other sources of visual content. Failing to do so could lead to legal issues, so read through all agreements carefully before committing to any image use agreement.
- Choose visuals that fit the message. Images should always complement the text, enhancing its meaning and making it more powerful. Avoid overly generic or unrelated pictures.
- Make sure images look consistent. When combining multiple types of visuals in one project, make sure they look like they belong together and have a consistent style.
- Consider the file size. Bigger images will take more time to load, so consider the file size before you include one in your project. Compressing it can reduce the size while still looking good.
- Choose the aspect ratio wisely. Images often look distorted when they don’t fit the project format. Make sure all visuals used have the right aspect ratio so that they can be displayed properly. A picture should be at least as wide as a typical website or application’s maximum width to look good on all kinds of screens.
- Be aware of the image formats. Different image formats can work better depending on the platform you’re using. JPEGs and PNGs are generally recommended for websites, while WebP is another popular option, as these images are typically 25-30% smaller.
Summary
There are many sources of visuals that you can use for your website, depending on your needs and budget. From stock photos to AI-generated images, you can pick from plenty of options. It’s important to research all options available before deciding which route to go down to ensure optimal results with limited risk from any legal repercussions associated with certain content sources.


