
Looking for an efficient way to convert your images to WebP and…
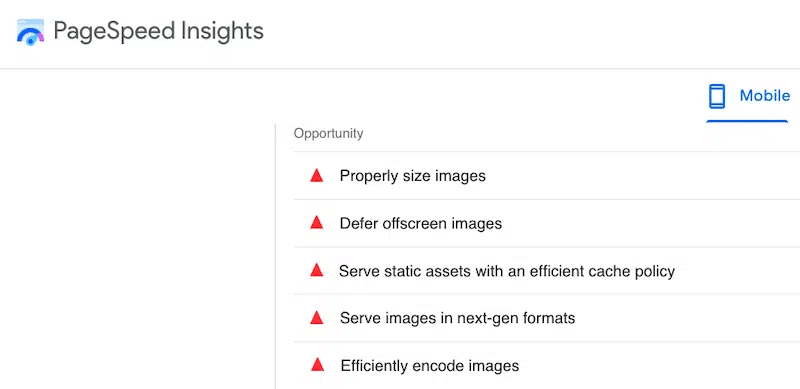
Do you want to know how to reduce the size of your images without compromising their quality? You’ve come to the right place. The more you have large images, the more bandwidth and space you’ll use, which can become a real problem for performance. Even Google says that you should optimize your images for page speed by properly sizing and encoding them:
However, you may think tactics like “resizing” or “compressing” can alter the user experience by serving blurred and pixelated images to your visitors. That’s common thinking, but enough with the preconceptions, and let’s restore a bit of truth instead!
In this article, we share some techniques to help you reduce an image file size without losing its visual quality. The solutions we are offering are very easy to implement, and they will help you to free up some server space and improve your page loading speed in no time.
How to Resize Image File Size Without Losing Quality Online
To reduce the MB or KB size of a photo, you can resize the image dimension and compress it. Both techniques will save space on your server and will make your page load much faster.
Resize Image Dimensions
Resizing alters the image’s dimensions and allows you to make your image file smaller without removing any part of it. For instance, the best way to reduce the size of a JPEG is to use an easy tool like Imagify, which offers both a cloud-based online platform and a WordPress plugin. You can also use design software like Photoshop or a desktop app like Preview (on Mac).
Let’s go over each option so you can choose which tool is the best for you.
1. Use the WordPress Library to Resize Images
If you are building a WordPress site, using a plugin to resize your images will be very handy. You can also head to the default WordPress Library and follow the steps below:
- Head to Media > Library from your WordPress admin panel.
- Upload or select the image that needs resizing.
- Click on Edit Image.
- Enter the new dimensions for your image under the Scale Image heading.

Downside: the WordPress Library does not compress your image. When you reduce the size from there, the image loses its quality.
2. Use A WordPress Plugin to Resize Images
You have several WordPress plugins that can help you to resize images without impacting the quality, such as:
- Imagify – The easiest image optimization plugin that helps you resize and compress images to boost performance and reduce server space usage.

- Resize Image After Upload – Resizes images (JPEG, GIF, and PNG) when uploaded to WordPress within a given maximum width and/or height.

- Imsanity – Automatically resizes huge image uploads and chooses whatever size and quality you like. There is also a bulk-resize feature to resize previously uploaded images and free up disk space.

3. Use a Desktop App to Resize Images
If you need to reduce the size of hundreds or thousands of images, then opting for desktop software can be a good option. Amongst them, you’ll find:
For Windows:
- IrfanView – Simply open an image and go to Menu > Image > Resize/Resample and reduce the image dimensions in pixels.

- RIOT (Radical Image Optimization Tool) – Select your images and open them in the Batch Optimizer, then specify the new size.

For Mac:
- Optimage – Lets you quickly resize images and videos in batch mode (free for 24 images per day). Open your photos with Optimage and change their size using the interface below:

- Preview – Free built-in image viewer and PDF viewer of the macOS operating system. Open the images with Preview and go to Tools > Adjust size. Then select the dimension you want to apply for the images:

4. Use an Online Platform to Resize Images
Another way to reduce image size without impacting quality is to use a cloud-based platform that does the job for you, such as:
- Free Imagify web app – We’ve mentioned the plugin before, but Imagify also comes with an online platform where you can resize and compress images.

- BIRME (Bulk Image Resizing Made Easy) – A free and easy-to-use image resizer for any specific dimensions.

- Bulk Resize Photos – A very handy tool to add watermarks, resize and compress your images for free.

5. Use Design Software to Resize Your Images
- Photoshop or Lightroom – You can easily resize images by going to Image > Image Size. From there, you can adjust width and height or change an image’s resolution, measured by pixels per inch.

Once your images are at the best size for your website, you can move to the second step and compress them.
Compress Images (JPG, PNG, GIF)
You can compress your images in two ways: lossless or lossy. Use the lossless mode if you don’t want to lose any bits of quality at all but note that the “lossy” mode makes the change almost invisible to the naked eye.
Look at our example below, can you spot any differences in the quality between lossless and lossy? It looks like the compression has not altered the visual quality at all.

To compress images without impacting quality you can use an online tool or a WordPress plugin, let’s go over each option.
1. Using an Online Tool to Compress Images
Here are the best online tools you can use to compress images without losing quality:
- Free Imagify web app – Lets you choose between lossy and lossless compression. You need to register for an account to access automatic resizing and remove the 2 MB limit.

- Kraken Web Interface – Lets you choose between lossy and lossless compression. Individual images cannot exceed 1 MB. You can also resize your images (this option is in the pro version).

- TinyJPG and TinyPNG – Only offer lossy compression, so you shouldn’t use these tools if you want to use lossless compression.

2. Using a WordPress Plugin to Compress Images
The best image compression plugins to speed up your site and reduce the file size without losing quality are:
- Imagify
- Optimole
- ShortPixel Image Optimizer
- EWWW Image Optimizer
- Compress JPEG & PNG images by TinyPNG
- Remush.it
If you are using WordPress, then using a plugin may be the handiest solution to compress your images directly in the admin.
| 💡Both resizing and compressing reduce the image file size, making them easier to share by email or upload on a WordPress site. |
How to Make Images Smaller Without Losing Quality
We are using Imagify to reduce the MB of a photo to KB in a few clicks. Imagify is one of the easiest image optimizers that allows you to resize and compress your large images automatically using a Smart Compression mode.
| 💡Imagify has a double hat: it offers a free WordPress plugin and a cloud-based app if you are not a WordPress user. |
We’ll detail both approaches: from the WordPress admin using the WordPress plugin and the online platform.
Using the Imagify Plugin to Reduce Image Files Without Impacting Quality on WordPress
Imagify is one of the simplest tools to reduce image size and save space on your server, all without impacting the visual quality of the image. To get started, head to the WordPress repository to download Imagify for free.
- Install and activate the free Imagify plugin on your WordPress site.
- Create your account and generate your API key.

- Go to Settings > Imagify to configure your optimization settings in your WordPress dashboard. There you can auto-optimize images on upload, decide to back up original images, and apply lossless compression if needed.
| 💡By default, Imagify will use the Smart Compression mode to optimize the performance while maintaining perfect quality. |

- Bonus: You can uncheck the Backup original images box to save space on your server.
- Scroll down to the setting of Resize larger images, which lets you automatically resize large images to a certain max dimension. For zero drop in quality, you’ll typically want to set this to be around double the dimensions you’ll be using the images.

- Go to the bulk optimization panel and hit the IMAGIFY’EM ALL button to resize and compress all your images in one click.

- If you want to optimize your images individually, go to the WordPress Library instead and click on the blue Optimize button in the Imagify column to start the optimization:

- And that’s how you reduce the image file size from MB to KB, thanks to Imagify:

To summarize, this is how the Imagify plugin helped us to reduce the image file size while preserving great quality:
| Before Imagify | With Imagify (after image resize and compression) | |
| Image file size | 1.90 MB | 79.15 KB |
| % total savings | / | 95.94% |
| Image quality | High-quality
| The visual aspect of the image remains unchanged
|
| Image format | PNG | Converted to WEBP (WebP is a next-gen format recommended by Google that can help reduce file size even more) |
Key takeaways:
- Even after resizing and applying compression to the images, the quality remains intact with Imagify.
- We’ve saved up to 95% on our file size, from 1.90 MB to 79.15 KB.
- We’ve also generated a WebP format which is the next-gen format that Google recommends using online.
| 🔊 Important to note: as of March 2024, Imagify also converts images to Avif, the other next-gen format recommended by Google to make your images lighter. |
Pricing: Imagify lets you optimize ~200 images per month (20 MB) for free. Or, paid plans start at $5.99 per month for 500 MB or $9.99 per month for unlimited.
If you are not using WordPress, then you can opt for the cloud-based version of Imagify instead.
Using the Imagify Cloud-based Platform to Reduce Image Files And Preserve Quality
If you are not using WordPress but are still looking for an online tool to resize your images, then you can use the Imagify cloud-based platform. It’s entirely free if you plan on uploading files that weigh under 2MB.
Alright, you can head to Imagify’s platform and create a free account.
- Choose your compression level between Smart and Lossless. The Smart Mode is the one used by default.
| 💡Hint: Smart Compression = best balance between compression and performance while maintaining the quality of the image. Lossless = zero impact on quality, but you won’t make the most out of image compression and optimal performance. |
- Select the output option named Resize Images.
- Specify the value of your choice. We put 800 px in our example, but you can also put a percentage.
- Drag and drop your image.

5. Simply download your optimized image by Imagify.

Wrapping Up
WordPress image optimization techniques are necessary to save space, improve loading times and improve performance. With a tool like Imagify, it’s easier than ever to reduce file size without compromising quality. Whether you are using WordPress or not – either pick the free Imagify plugin or opt for the free trial on the cloud-based version.


