Looking for an efficient way to convert your images to WebP and…
Every professional photographer needs a portfolio to show to potential customers – and the best place to showcase your work is on your website.
But what if you don’t have your own photography website? Well, it’s time to build one!
In this post, we’re going to be showing you how to make your own stunning WordPress photography site in 9 easy steps. Ready? Let’s get started!
1. Sign Up for a Web Hosting Service and Secure Your Domain
The first step is to sign up for a web hosting service and purchase your domain.
Your web host provides the servers and services you need to publish your website to the internet so that other people can visit it.
Your domain is your web address. It’s what people type into their URL browser in order to visit your site (e.g. https://www.yourdomain.com).
Your domain name can be whatever you want but, if you’re a freelance photographer, a safe bet is to just stick with your name (e.g. https://www.angelikakollin.com/).
Ideally, you’re going to want to choose a web hosting service that includes a free domain name and comes with WordPress pre-installed, like Bluehost or Dreamhost shared WordPress hosting plans.
2. Install WordPress
The next step is to install WordPress. WordPress is a free open-source CMS that provides the tools you need to actually build your site.
Depending on what web host you signed up for, WordPress might already be pre-installed. If so, go ahead and access it through your web host dashboard.
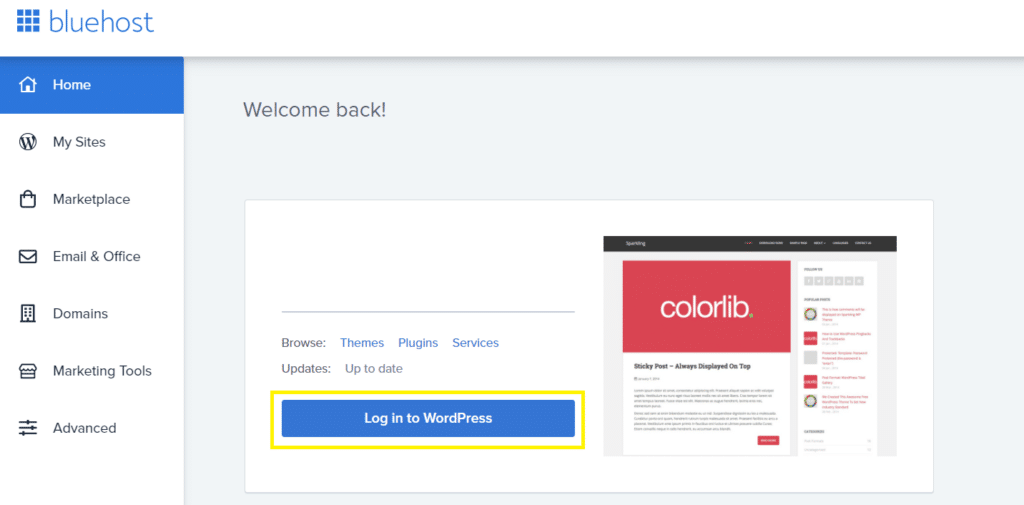
If not, you may need to install it manually. Again, the best way to do this is through your web host. Most hosting providers provide instructions on how to install WordPress through your cPanel and something like Softaculous.
You can also install WordPress locally by downloading it to your computer from WordPress.org. However, I wouldn’t recommend it as you’ll have to then upload the site to your hosting cPanel manually.
3. Choose a Lightweight Theme
Once you’re in WordPress, the first step is to choose your theme. To do so, navigate to Appearance > Themes and click Add New Theme.

You can then browse the theme category to choose one that you like. We’d recommend choosing a lightweight theme that’s compatible with WordPress page builders. Some popular options include OceanWP, Astra, GeneratePress, and WordPress’s default theme (currently Twenty Twenty-one). You can also check out the list of the fastest free WordPress themes and pick the best one according to your needs.
For this tutorial, we’ll be using Twenty Twenty-one. If you choose a different option, the next steps will still be largely the same, but there may be a few minor differences.
Once you’ve found one that you like, click Install.
4. Customize the General Layout
After you’ve installed your theme, open up the customizer (Appearance > Customize).
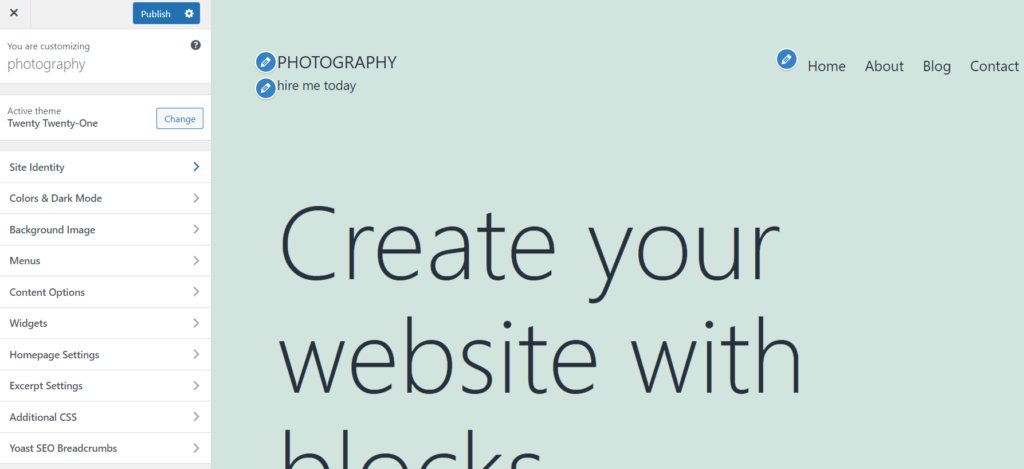
From here, you can make a ton of changes to the design of your website. For now, we’d recommend just doing the following:
- Change your header image. If you’re using the Twenty Twenty-one theme, click Header Media and hide the image (or replace it with an image or video of your own).
- Edit your site title and tagline. Click the Site Identity tab and change your site’s title and tagline to whatever you want. You can also upload an icon (this appears in the browser URL) and logo.
- Change your fonts. You can also make global changes to the fonts used across your site. You can change specific elements including headers, paragraphs, links, etc.
5. Install Plugins
Next, we’re going to need to install a few plugins. Plugins are third-party extensions that you can activate on WordPress to extend the functionality of your site.
You can install them from the Plugins page. From your WordPress dashboard, click Plugins > Add New.

From there, search for, install, and activate the following:
- Full Width templates. We’re going to use this to modify our homepage so it displays in full width.
- Visual portfolio. We’re going to use this to create our photography portfolio.
- Optin Forms. We’re going to use this for collecting emails and building a powerful email list.
- Imagify. Imagify will automatically optimize all images you upload and convert them to WebP to minimize file sizes and page loading speeds. This can help boost your SEO as page loading speed is an important ranking factor. Just make sure to check the ‘auto-optimize images on upload’ box on the settings page. You can try it for free and see how easy and effective the plugin is.
As a (paid) bonus, we also recommend trying WP Rocket, the performance plugin that will help to speed up your site and improve your Core Web Vitals scores in a few clicks.
6. Create Your Homepage
Next, we’re going to add a homepage. This part’s easy. Just go back to your WordPress dashboard and navigate to Pages > Add New.
Enter the title as “Home” or something similar. Under the Page Attributes section on the right-hand side, click Template and choose FW Full Width, then click Publish.
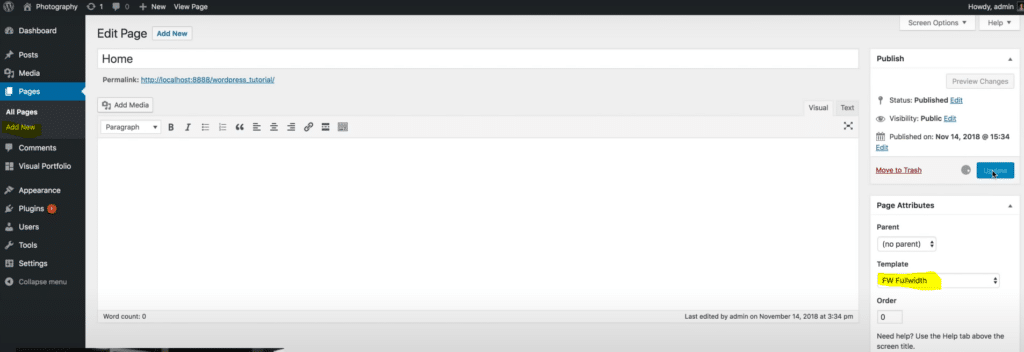
Once you’ve done that, open up the customizer again and select Homepage Settings. Change the settings to Display a static page and select the page you just made from the homepage dropdown, then click Publish.
7. Create Your Photography Portfolio
Next, we’re going to build our photography portfolio. From your WP dashboard, navigate to Visual Portfolio > Portfolio Layouts and click Create your first portfolio list.
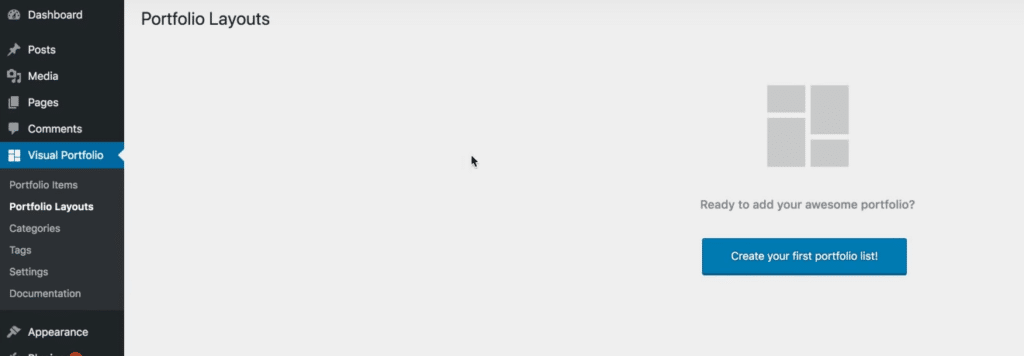
Under Content Source, click Images and hit the plus button to upload any photos you want to include in your portfolio.
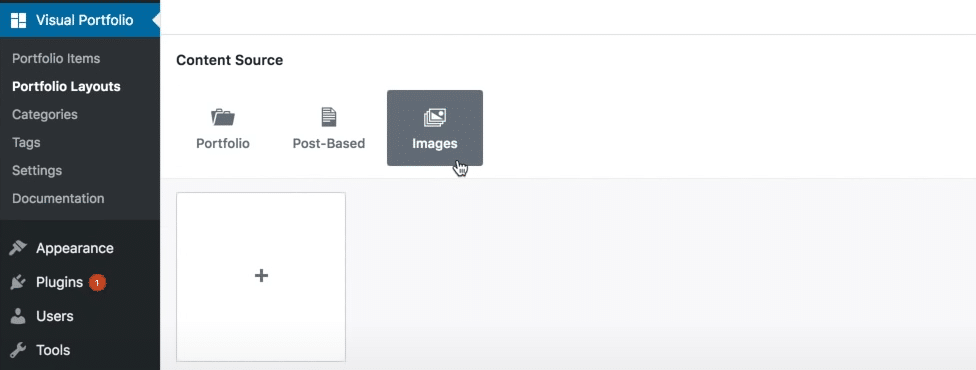
Once you’ve uploaded them to Visual Portfolio, you can click them to open up a preview of your Visual Portfolio grid. You’ll also see some styling options on the right-hand side.

We’d recommend using a Tiles layout in a 3-by-3 grid formation. You might also want to reduce the gap so that there are no spaces between each of the images in your portfolio grid and set the items per page to 9.
Make any other design changes you’d like and then click Publish. Grab the shortcode from the top right of the page and go back to your dashboard.
8. Add Your Portfolio to Your Homepage
Now we’ve made our portfolio, we’re going to add it to our homepage. Navigate to Pages > All Pages and select your homepage. Paste the shortcode into the editor and click Update.

You can then click Preview to see what your homepage looks like. If you’ve done everything right, you should see a beautiful full-width portfolio of your work underneath your site title.
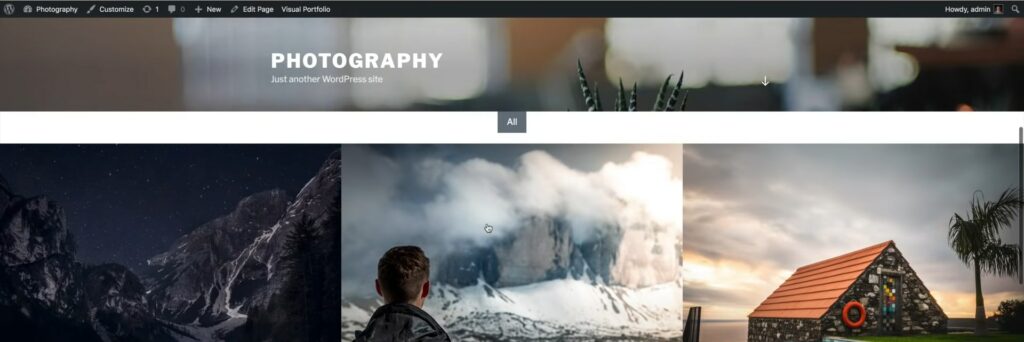
If you’d like to make any changes to your portfolio, you can go back to the Visual Portfolio plugin page and reorder, remove, or add new images.
9. Create Additional Pages and Tweak the Design (Optional)
You now have a pretty awesome one-page photography website, but you might also want to add a few more pages. To do so, you can go back to Pages > All Pages. We’d recommend adding:
- An about page. Include information about who you are, your experience and qualifications, etc, and add a photo of yourself.
- A contact page. Add a contact form for customers to use to get in touch with you.
- A services page. Add a pricing table with a list of your different photography services and packages.
Finish building your site by making any other changes you want to make (such as adding a cookie consent banner and privacy policy, making design changes, installing other plugins, etc.), and you’re done.
Congratulations – you now have an awesome WordPress photography site!
We hope you found this guide helpful. Good luck!


