
Looking for an efficient way to convert your images to WebP and…
Are you searching for the best WordPress image compression plugins? Look no further! If you feel overwhelmed by fine-tuning and optimizing each image on your website one by one, you’ll appreciate our compilation of plugins that can handle the heavy lifting for you.
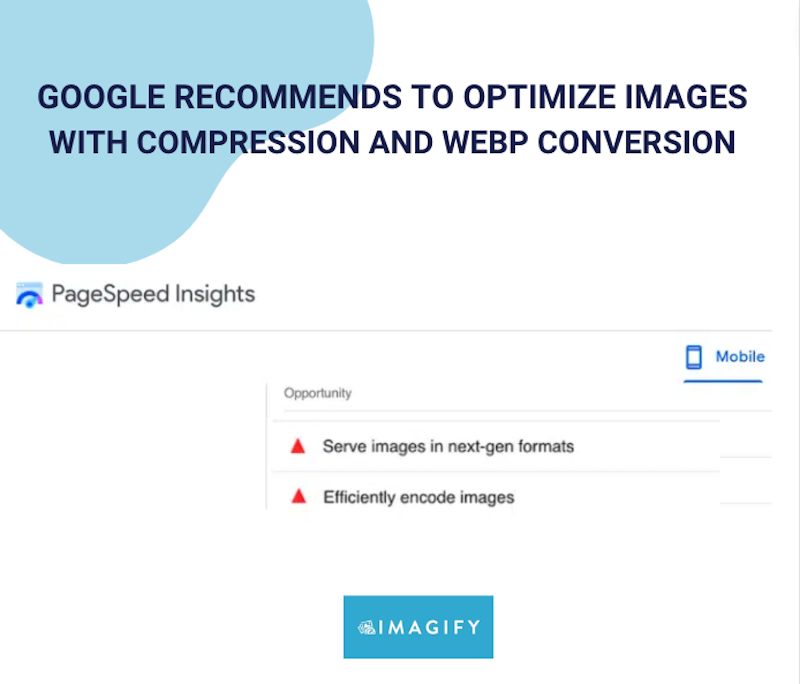
Image optimization is essential to boost your site’s speed and performance. In the PageSpeed Insights report, Google emphasizes the importance of appropriately encoding images (compression) and delivering them in a next-gen format (conversion to WebP).
In this article, we explore the best plugins designed to compress images and optimize the performance of your WordPress site. We also highlight the 14 key features a reliable compression plugin should have. And as a bonus, you’ll see a short tutorial on optimizing images with Imagify easily.
The Top 5 Online Image Compression Plugins (Free + Paid)
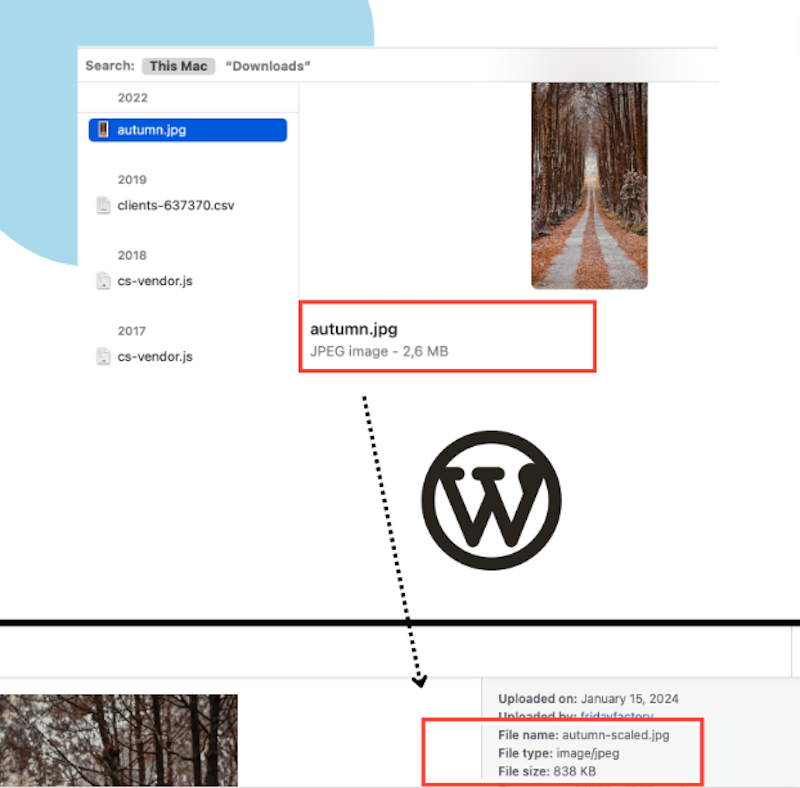
By default, WordPress automatically resizes and compresses images upon upload to the media library. Here’s an example with a JPEG image measuring 2072×3980 px and weighing 2.6 MB on my desktop. Once uploaded to the WordPress library, it was reduced to 838 KB with dimensions of 1333×2560 px.
But if you’re looking for more advanced settings and superior compression without compromising quality, a dedicated WordPress plugin becomes crucial. Using a plugin allows you to have finer control over the compression process, ensuring that your images are optimized to the highest standards while retaining their visual integrity. Let’s go over the 5 best image compression plugins available on the market.
1. Imagify – Optimize Images & Convert WebP and Avif
With more than 800,000 active installations, Imagify is one the easiest image optimizers for WordPress that compresses images, converts them to WebP and Avif, and speeds up your website. It also comes with powerful bulk compression and a lean interface that saves you a lot of time during the optimization process.

Key features:
- Smart compression (lossy)- Automatic image optimization, ensuring a good compression level and optimal quality.
- Lossless compression – Zero impact on quality.
- Async Bulk Optimization – Optimizes multiple images at once (in the background).
- WebP and Avif Conversion – Next-gen formats recommended by Google.
- Automatically resize larger images.
- Integrates with other Content Management System (CMS) platforms through its API.
- Performance-oriented plugin: same owners as WP Rocket and RocketCDN.
Pricing:
You can use Imagify on unlimited sites, and all the features are included in the free version with no restrictions. There are three plans available:
- Starter: free for 20MB per month (around 200 images).
- Growth: 500MB per month at $5.99 per month (around 5000 images).
- Infinite: Unlimited MB at $9.99 per month.
2. Image Optimization by Optimole
With 200,000 active users, the Optimole plugin is known for its efficient interface design, coupled with machine compression capabilities. This tool allows users to optimize their images seamlessly and to select a few more optimization options, such as lazy loading and an image CDN.

Free features:
- Machine learning compression – Optimole uses Machine Learning algorithms to detect how to get the smallest possible size with minimum perceived quality losses. You can also disable it and apply compression manually from low to high.
- Lazy-loading – a technique that defers the loading of non-visible images until they are about to be displayed on the user’s screen.
- Watermarks – To set a watermark, just click on the image within the library and click on the Watermark tab.
- Gif to video conversions.
- WebP and AVIF conversions.
- Strip Image metadata (Removes extra information from images, including EXIF and IPTC data (like camera settings and copyright info).
- Serves images from a global CDN for free – Optimole’s CDN is integrated and powered by Amazon CloudFront.
- Optimole cloud to save images.
Premium features:
- Faster support With Priority & Live Chat support.
- Extended visits limit.
- Custom domain (you can use your own custom domain name for CDN-served images instead of an Optimole subdomain).
- Get a performance audit of your site.
Pricing:
- Free version is limited to 5000 visits a month. Then, the plans vary according to the number of visitors each month. For 50,000 monthly visits, it costs $26.34 per month. You’ll need to upgrade if the number of visitors exceeds that.
3. Smush – Optimize, Compress, and Lazy Load Images
Smush is another image optimization plugin designed to enhance the performance of WordPress websites by optimizing and compressing images. Developed by WPMU DEV, Smush offers both free and premium versions with varying levels of features.

Free features:
- Choose the level of compression that suits your needs:
- Basic Lossless compression – Strip unused data and compress images without affecting image quality.
- Super Lossy compression – Substantial file size reduction with excellent image clarity.
- Lazy loading to prioritize the images in the viewport.
- Incorrect image size detection – Quickly locate images slowing down your site.
- Individual optimization for each image.
- Compress non-WordPress images that are outside of your uploads directory.
- Image resizing to avoid large files.
- Bulk restore if needed.
Premium features:
- Serve images faster with the Ultra compression mode.
- 10 GB Smush CDN.
- Background optimization and bulk optimization running async.
- Unlimited image optimization.
- Serve next-gen formats with WebP conversion.
- Access to all the premium plugins offered by WPMU DEV.
- Gravity Forms and Nextgen Gallery integrations.
- 24/7 live WordPress support.
Pricing:
Free plan available with limited features. There is a Basic plan from $3 per month, including 1 site, unlimited image optimization, all the premium features, and 5GB of backup storage.
4. EWWW Image Optimizer
Almost 1M sites are using it to optimize their images without losing their quality. EWWW Image Optimizer is a WordPress plugin designed to automatically optimize and compress images on a website, reducing file sizes and improving overall performance. It offers lossless and lossy compression options and can optimize images within the WordPress media library and externally.

Free features:
- Unlimited images and Pixel Perfect (lossless) compression.
- Compress JPG, PNG, GIF and SVG files.
- Resize images on uploads.
- Add missing dimensions and auto-scale for responsive images.
- Lazy loading on below-the-fold images.
- WebP conversion.
- Sharpen thumbnail images.
- Optimize any image folders.
- Image backups.
- Free support.
Premium features:
- 5x premium compression.
- Compress PDF files.
- Auto-WebP/AVIF.
- Watermark images.
- CDN delivery and 30-day cloud-based backups.
- Page caching and code optimization.
- Priority support.
Pricing:
A free version is available for $7 per month with all the premium features mentioned above. That makes it one of the most affordable plugins on the market with advanced features, providing excellent value for money.
5. TinyPNG – JPEG, PNG & WebP Image Compression
TinyPNG is a WordPress plugin designed to streamline image optimization for websites but also uses a web app. This plugin automatically optimizes all your images by integrating with the popular image compression services TinyJPG and TinyPNG.

Free Features:
- Lossy compression.
- Automatically optimize new images on upload.
- Advanced background optimization (bulk compression) to speed up your workflow.
- Optimize individual images already in your media library.
- Automatically resize huge image uploads by setting a maximum width and/or height for a more reasonable browser display.
- Multisite support with a single API key.
- Color profiles are automatically translated to standard RGB color.
- Convert CMYK to RGB to save more space and add compatibility.
Premium features:
- WebP conversion.
- Upload images up to 150MB (web app).
Pricing:
If you use the WordPress plugin: You can optimize roughly 500 images each month for free, and a paid account removes these limits. That’s how the pay-per-compression model works:

How Do The Image Compression Plugins Compare to Each Other
Explore the visual table below, highlighting the key image optimization features to help you make a decision according to your needs:
| Features | Imagify | Optimole | Smush | EWWW | TinyPNG |
| Smart/Machine learning lossy compression | Yes | Yes | Yes (pro) | Yes | Yes |
| Manual Lossless compression option | Yes | No | Yes | No | No lossless compression |
| Compression on-upload | Yes | Yes | Yes | Yes | Yes |
| One-click image compression option from the library | Yes | No | Yes | Yes | Yes |
| Async Bulk Optimization that runs in the background | Yes | Yes | Yes (pro) | Yes | Yes |
| Supports the most popular image files formats, including GIF | Yes | Yes | Yes | Yes (pro for PDF) | Not PDF or GIF |
| WebP Conversion | Yes (and AVIF) | Yes (And AVIF) | Yes (pro) | Yes | Yes (pro) |
| Resizes large images | Yes | Yes | Yes | No | No |
| Simple interface | Yes | Yes | Yes | Yes | Yes, but the design could be improved |
| Folders compression | Yes | No | Yes | No | No |
| Backup available | Yes | Yes, if stored in the Cloud | Yes | Yes | No |
| Free plan | Yes, 20MB/mo | Yes, 5000 visits/mo | Yes (less features) | Yes (less features) | Yes (500 images/mo) |
| Free plan offering all the features | Yes | Yes | No | No | Yes |
| Works with any CMS | Yes, with the API | No | Yes, with the API and CLI app | No | Yes, with the API |
Now that you know about the best tools available on the market, here are 14 tips that should help you make up your final choice.
14 Tips to Choose the Best WordPress Image Compressor
- Compression Quality: You need to achieve significant file size reduction without compromising image clarity or sharpness. You don’t want a plugin that over-compresses the image and serves something blurry to your visitors. Compression should positively impact the user experience, not the other way around. For instance, if you are a business or web agency owner showcasing your portfolio, you want to provide clear and perfect images, right?
- Compression Methods: Opt for a plugin that offers both lossy and lossless compression methods for diverse optimization needs. For an online shop, you may need the lossy options to optimize the speed as much as you can. However, if you are a photographer who is not willing to compromise on quality, then you need to be able to offer lossless compression.
- Async Bulk Optimization: Ensure the ability to optimize multiple images simultaneously for efficient bulk processing. If you have a website with hundreds of images to be optimized, you don’t want to go through each of them manually.
- Single Optimization: Capability to optimize individual images if needed. This option allows you to manually select instead of optimizing every site image.
- Image Format Support: Look for support across various image formats, including JPEG, PNG, GIF, and WebP.
- WebP Conversion: Capability to convert images to WebP format (the next-gen format recommended by Google) for improved performance and faster loading times. For marketers and SEO experts out there who have designed the most beautiful infographics or graphs, make sure to optimize them properly and serve them in WebP or Avif. It has the same quality as a JPG or PNG, but an even reduced file size.
- WooCommerce Support: Compatibility with WooCommerce for efficient optimization of product images in online stores. As a business owner or if you own an online shop, serving optimized images is the key to fast-loading sites. Don’t overlook the image quality post-compression, and ensure that the product image remains sharp and clear; otherwise, it could impact conversions.
- Automatic Optimization on Upload: Enable automatic optimization of images upon upload, saving time and streamlining the process. Ensure you can also deactivate this option if you don’t want to optimize all your images.
- Performance Impact: Assess the plugin’s impact on site performance using tools like PageSpeed Insights before and after implementation. If the plugin is efficient, you should see some warnings disappear. This part is crucial for web designers and developers in delivering the site to a client. You must impress and show a fast-loading site that has passed all the performance metrics.
- Compatibility with WordPress Versions: Ensure the plugin is compatible with your WordPress version to avoid potential conflicts.
- User-Friendly Interface: Opt for a simple and intuitive interface for hassle-free navigation. You want to be able to apply a few options or cancel any tasks in a click or two, no more.
- Regular Updates and Support: Select a plugin with consistent updates and reliable support to address issues and maintain compatibility.
- Offer Backup Options: Look for plugins that provide backup options to safeguard your original images.
- Pricing: Consider the cost of it, especially when dealing with a large number of images.
How to Compress Images on WordPress with Imagify
One of the easiest ways to compress images on WordPress is to use Imagify. The plugin automatically optimizes images thanks to the Smart compression option; it reduces image files while balancing performance and quality. I’ll show you how I compressed my JPG image from 1.9 MB to 79 KB (-95%) without impacting the visual quality – in only 3 minutes!
For reference, here’s my original JPG image before compression:

It’s time to see Imagify in action! Here’s how Imagify optimizes images:
- From your WordPress admin, Go to Plugins > Add New Plugin and install the free Imagify plugin available in the WordPress repository. Activate Imagify.

Imagify installation – Source: Imagify
2. Follow the installation wizard and create a free account, or enter your API key if you already have one.

3. Go to Settings > Imagify and select the options you need in the straightforward interface. By default, Imagify already has the most efficient optimization options activated:
- Optimize all the future images that you will upload.
- Save the original images.
- WebP/Avif conversion (as per Google’s recommendation).
- Resize larger images.
- Smart compression (note: that’s the default compression level as it offers the best compression ratio quality).

4. Head to the WordPress library and click on the Optimize button:

5. That’s it! Imagify used its Smart compression and converted my picture to WebP without impacting the quality. My file went from 1.90 MB down to 79.15 KB, which is more than 95% savings.

Can you tell if there is a quality difference between the 1.90 MB file and the 79.15 KB file? I can’t!

Other Image Compression Scenarios
- How to resize and compress several images at the same time?
Use Imagify’s bulk compression feature. In that case, no need to go to the WordPress library. Instead, navigate to the bulk optimization tab and click on the “IMAGIFY’EM ALL” button.

- You are a photographer who cannot afford to compromise on quality but still desires to implement minor speed optimizations.
In that case, check the Lossless compression box:

| 📖 Not sure which type of compression is made for you? Check our guide to learn more about lossy vs lossless compression. |
To sum up, Imagify makes images lighter easily and helps improve your site’s loading time. It also gives an extra boost to the PageSpeed performance score and specific metrics related to images such as: Efficiently encode images (with the Smart compression feature) and Serve images in the next-gen format (with the WebP conversion feature).

| 🏆 These enhancements made with Imagify are crucial for your business as they elevate user satisfaction, boost conversion rates, and enhance SEO performance. |
Wrapping Up
If you’re seeking a method to enhance the loading speed of your images without compromising quality, a WordPress image compression plugin is your best ally! Image compression significantly reduces the size of larger images, leading to improved load times and an overall boost in your website’s speed. Images and other media typically constitute the largest portions of your web pages. Hence, it’s crucial not to overlook the optimization of images when uploading them.
Imagify offers a simple solution for compressing images and converting them to WebP and Avif, helping you save time. With just a few clicks, you can optimize all your photos for the web, leading to enhanced performance. Try Imagify for free and witness the speed boost achieved thanks to compression!


Hi
Your article is amazing. Very detailed explanation and clear…Your key features mentioned are useful for upcoming readers… Thanku for this wonderful post.. Keep going…