Looking for an efficient way to convert your images to WebP and…
If you run an audit of your WordPress site through PageSpeed Insights, Lighthouse may recommend you efficiently encode your images. PageSpeed Insights (PSI) is a tool that generates a performance report for your entire WordPress page. If it detects that your images could be better optimized, it triggers the “efficiently encode images” warning.

In this guide, we explain what efficiently encoding images means and how to check the status of your images. This is also an effective way to improve your Lighthouse performance score. We also share 6 image optimization techniques and a quick way to fix the “Efficiently encode images” warning.
Let’s dive in!
What Does Efficiently Encode Images Mean?
Efficiently encoding images means optimizing images to reduce their file size without significantly impacting their quality.
How does Lighthouse flag images as optimizable? What triggers this issue?
Lighthouse scans all your images on the page you are auditing, then sets the compression level to 85%. If the potential saving is 4 KiB or greater, they will report the image and flag it as an error in your performance report.
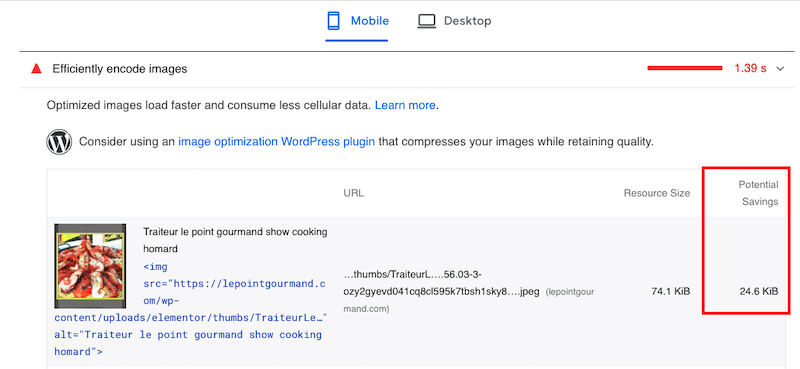
Uncompressed images at very high quality often result in large file size. And the larger the images are, the more time it will take to download and render them to your visitors. When this happens for all your images, the total loading time is likely to increase, and you may end up with a slow website.
To avoid this situation, we are sharing 6 optimization techniques that allow you to properly serve your images on the web.
6 Ways to Efficiently Encode Images on WordPress:
There are six steps you can take to efficiently encode images and tackle this PageSpeed Insight recommendation, including:
- Compressing Your Images
- Implementing Lazy Load
- Converting Images to WebP (Next-gen format)
- Serving Images with the Correct Dimensions
- Using an image CDN
- Replacing Animated GIFs with Video
Let’s go over each step.
1. Compressing Your Images
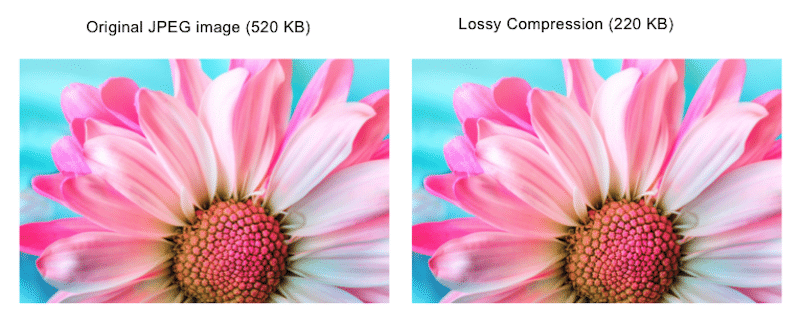
The goal of image compression is to reduce the image file without compromising too much quality. That makes PageSpeed Insights very happy because the images can be stored and rendered in the most efficient form, making them properly encoded. Image compression may be lossy but lossless if you prefer not to touch the image quality.
However, if you use the right tool, lossless compression is not visible to the naked eye.
In our example below, one is the original file, and the other has been compressed. Can you spot the difference? I can’t.
Remember, suboptimal images significantly affect your page speed and slow down your WordPress site. The easiest way to avoid any performance issues is to use a WordPress plugin. Don’t worry. We did the heavy lifting for you, and we have put together a list of the best image compression plugin for WordPress.
If you prefer the manual way to compress your images, we get you covered too. And if you feel overwhelmed by PhotoShop and Lightroom, there are plenty of alternative optimization tools you can use.
2. Implementing Lazy Load
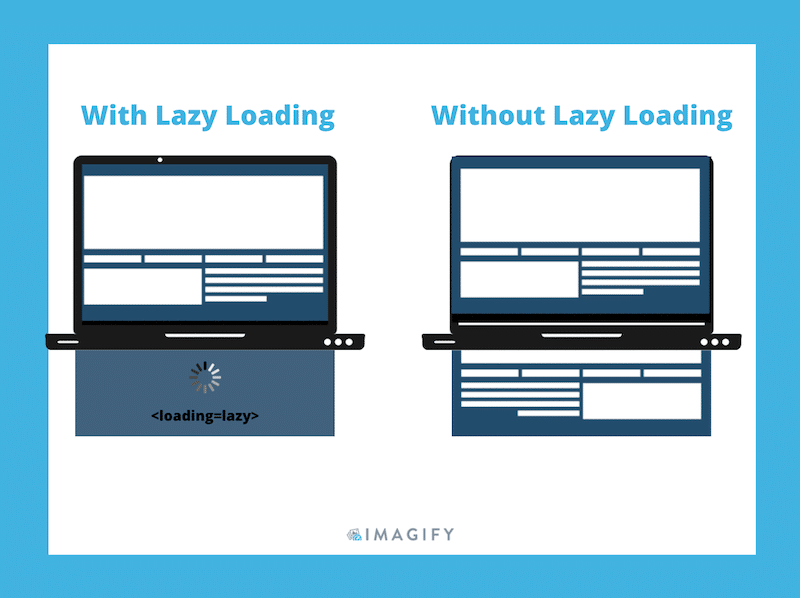
Lazy loading helps to efficiently encode your images because it’s an optimization technique aiming to display images only when needed. If the user views them, images will be rendered by the browser. Otherwise, the loading will be deferred to prioritize the most critical content. Google recommends “Defer offscreen images” on PageSpeed, which means applying the following lazy load script:
“loading=lazy”Remember, you should avoid setting this script for any images in the first visible viewport. Instead, apply the delay on the content below-the-fold:
If you don’t feel like implementing lazy loading manually, you can use a free WordPress plugin like Lazy Load by WP Rocket or take a look at the best lazy load plugins for WordPress.
3. Converting Images to WebP (Next-gen format)
Developed by Google, WebP is a next-gen image format that provides better lossless and lossy compression for images. This results in encoding your images better on your WordPress site and passing the PageSpeed audit.
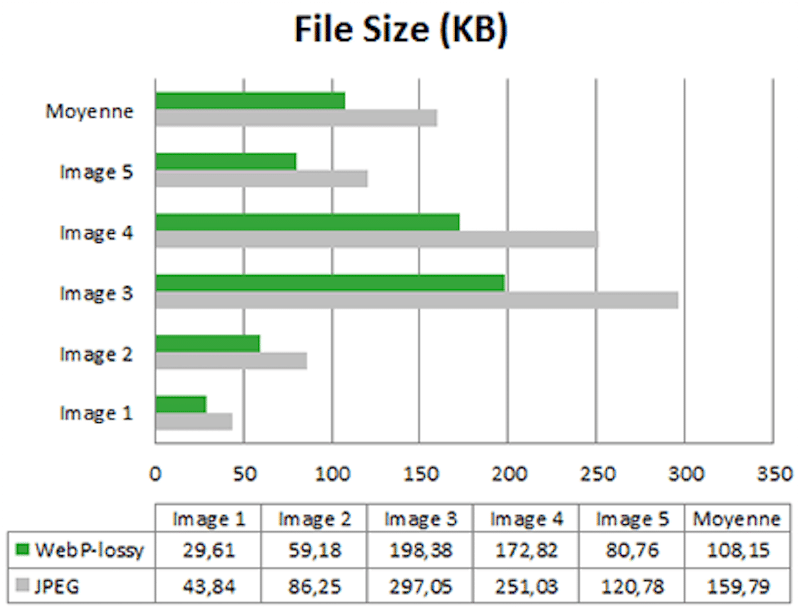
In fact, according to Google, “the average WebP file size is 25%-34% smaller compared to JPEG file size”. This table shows that WebP achieves better compression than the JPEG format:
Are you convinced? Imagify plugin can convert your images to WebP directly from the WordPress dashboard.
If you want to learn more about this next-gen format, we recommend reading how to use WebP format on WordPress.
| 🔊 Important to note: as of March 2024, Imagify also converts images to Avif, the other next-gen format recommended by Google to make your images lighter. |
4. Serving Images with the Correct Dimensions
Lighthouse makes it easy to find the incorrectly-sized images on your WordPress site. Simply audit your page, and if you find the “Properly size images” warning, you should resize them.
The DevTools Elements panel can also be used to check what size an image is displayed at:

That section sounds easy, but given the variety of screen sizes available in 2022, things can quickly get complex.
One rule: ideally, your page should never serve larger images than the user’s screen.
- The average desktop screen size is 1920 x 1080 pixels
- Most mobile phones have a device width of 400 px
For your WordPress site, you can either upload images through the media library or directly on your page. Google recommends ensuring that the optimal image sizes are used (including those for the responsive breakpoints). The key is to avoid using Full-Size images and resize them properly:
- Try to keep your image file size under 200 KB
- For most images, a max-width of 800 pixels is enough
Keeping images between these numbers will ensure that they load quickly on the user’s devices.
You can go further and optimize your images according to each device as shown below on Sketch:
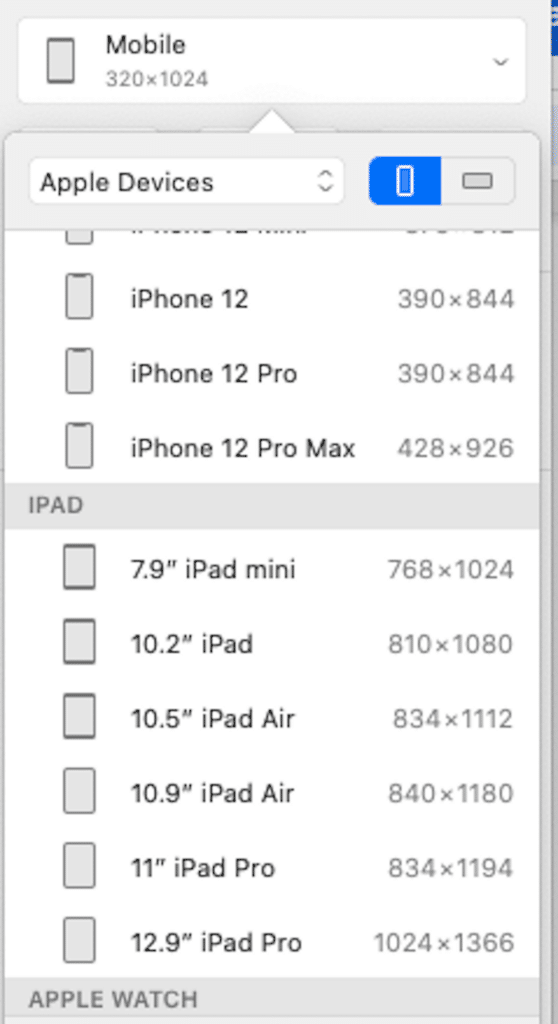
You have many choices to properly size your images and avoid your website slowing down:
- Do it manually with tools like Photoshop, Lightroom, Gimp, etc.
- Use an image optimization plugin like Imagify. Similar to the compression, you can also use bulk to resize all of the existing images on your site:

5. Using an Image CDN
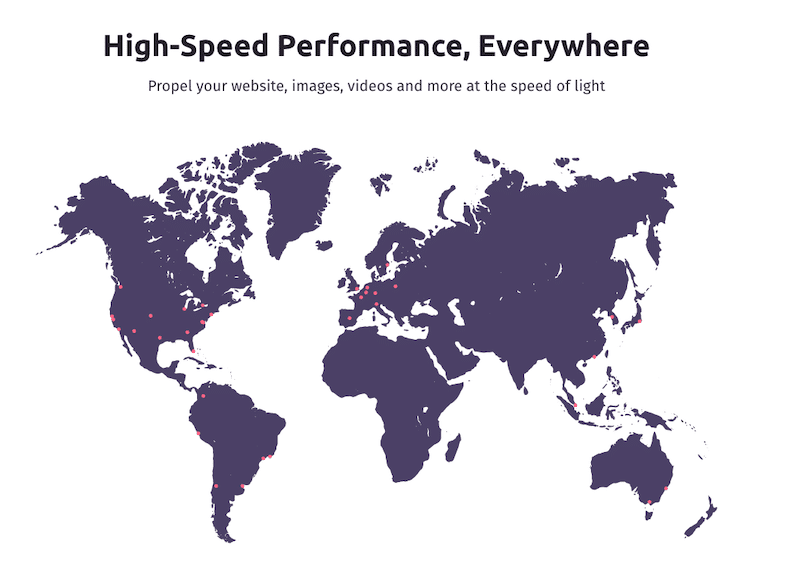
To efficiently encode images on WordPress, you should opt for a CDN provider. It will deliver your images faster and help get rid of Google PageSpeed image-related issues. A CDN offers many benefits and specializes in the optimization and delivery of images wherever your users are located in the world:
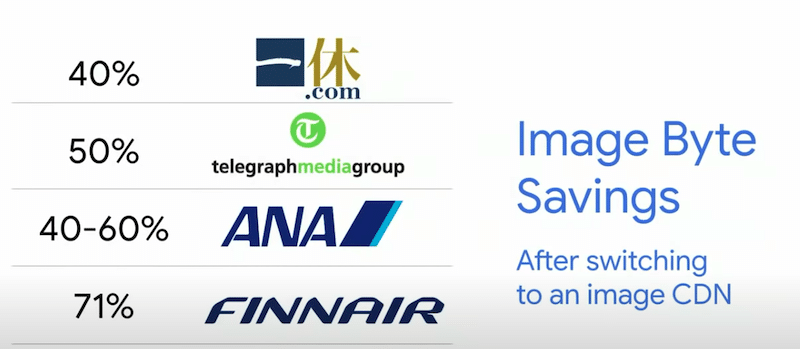
According to WebDev, “switching to an image CDN can yield a 40–80% savings in image file size”, as shown below:
6. Replacing Animated GIFs with Video
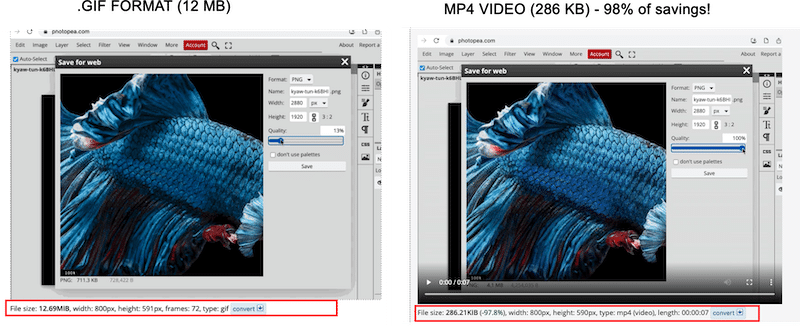
Replacing an animated GIF with a video will improve performance because a .mp4 video is much lighter than a GIF, as you can see in my example below:
– GIF file size: 12 MB
– MP4 file size: 286 KB (total savings: 98%)
PageSpeed also recommends to serve your animated content through the video format and not using GIF. When you convert your content to MP4, make sure to have the right settings to make it look like a GIF:
– It should loop continuously
– It should play automatically
– It should be silent
There are a number of ways to convert GIFs to video, I’ve used Ezgif for the above comparison.
Now that we have seen the 6 optimization techniques to efficiently encode images on WordPress, let me share my performance toolbox with you. It can be useful if you need to boost the speed of your WordPress site and make sure that your images are well optimized for the web.
| ⚒️ My toolbox to keep images optimized and always pass the PageSpeed Insights audits (including efficiently encode images): – Imagify, to compress my images and serve them to WebP (free for 20 MB of images every month) – Lazy Load by WP Rocket (free) – RocketCDN for delivering my images faster (only $8.99/mo for unlimited bandwidth) – Ezgif (free tool to convert .gif into .mp4) – WP Rocket, one of the best performance plugins to boost speed in a few clicks (helps the Core Web Vitals improve) |
In the next section, we are going to focus on Imagify, our powerful image compression plugin that efficiently encodes images automatically.
How to Fix Efficiently Encoding Images With Imagify
Thanks to Imagify, you can compress your images without compromising quality and fix the “Efficiently encode image” warning.
It’s time to see Imagify in action and compare PageSpeed insights with and without Imagify.
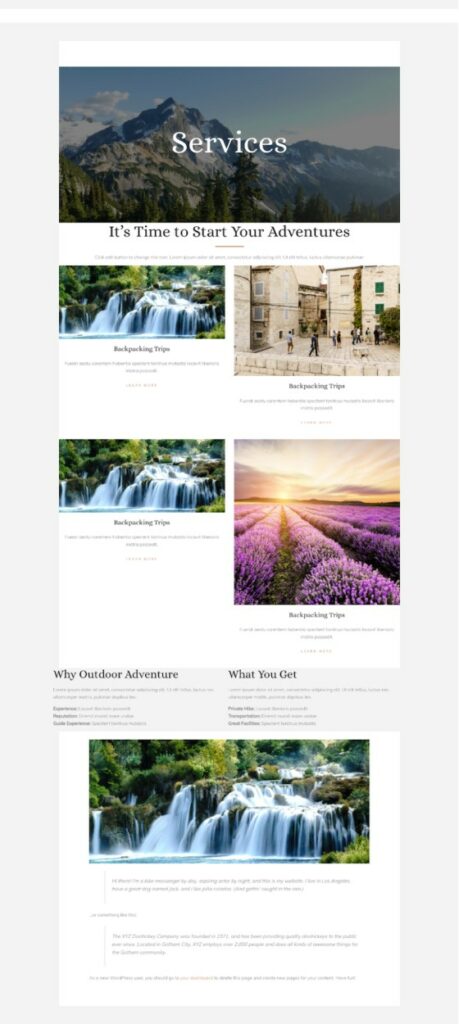
Before Imagify – My performance results on PageSpeed Insights
Lighthouse is not giving any great results, and I’m getting a few image-related issues, namely:
- Efficiently encode images (which is our topic for today)
- Serve images in next-gen formats
- Properly size images
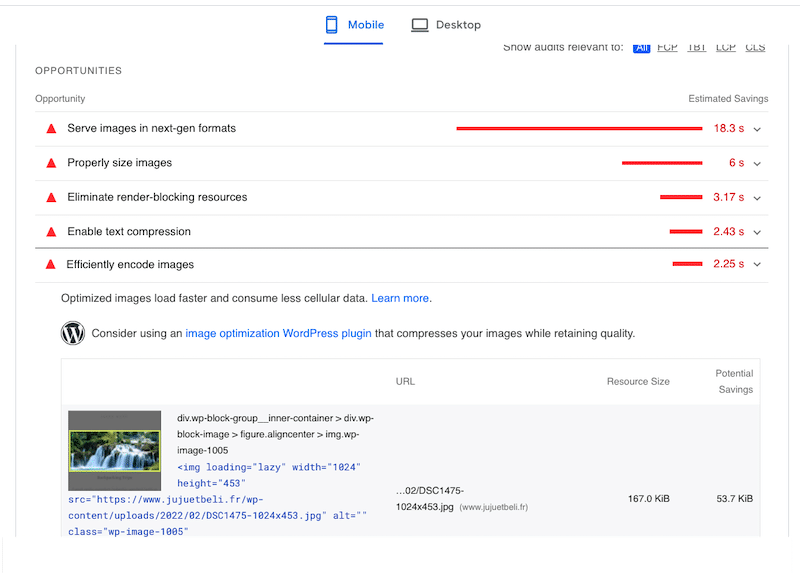
Now it’s time to download Imagify to compress and serve our images in next-gen formats, properly size them, and of course, efficiently encode them.
With Imagify – Performance results on PageSpeed Insights
✅ Imagify has fixed the “Efficiently encode image” warning! It has also optimized all my images and put my previous issues in the passed audit area:

✅ Imagify reduced my image file size by 90% – it went from almost 2 MB to 200 KB, as shown in our example below:

👉Do you want to get rid of the “efficiently encore image” warning, just like I did?
Install Imagify and apply the following settings:
- Set-up Imagify (it’s straightforward)
- Automatically optimize images thanks to Smart Compression
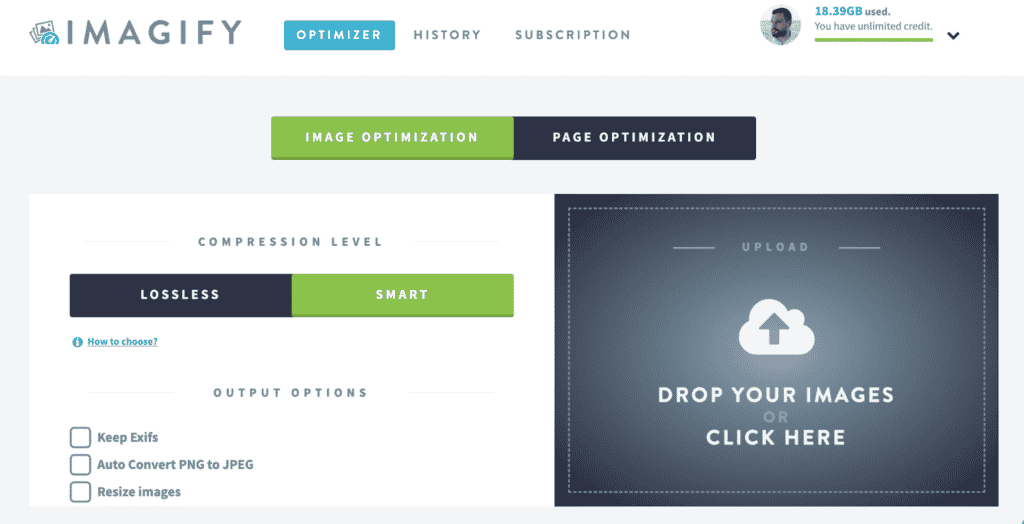
- Convert your images to WebP, the next-gen format recommended by PageSpeed Insights:
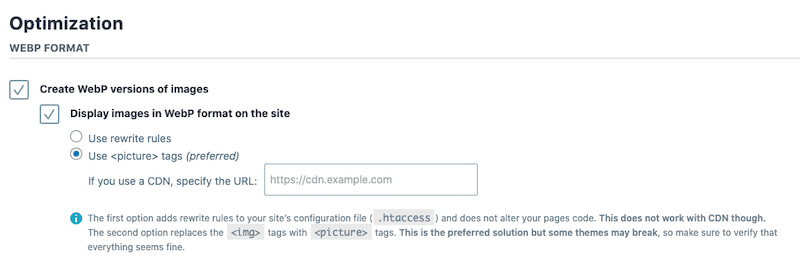
- Optimize your large images in bulk with Imagify. (That means optimizing the entire library in one single click!)
- And just like that, The PSI warning disappeared.
It’s worth mentioning that this image optimization process was entirely free!
The free version of Imagify lets you resize and compress 20 MB worth of images per month. If you are planning to add more images, you can opt for the following premium pricing:
- $5.99 per month for 500 GB (around 5000 images)
- and $9.99 per month for unlimited usage.
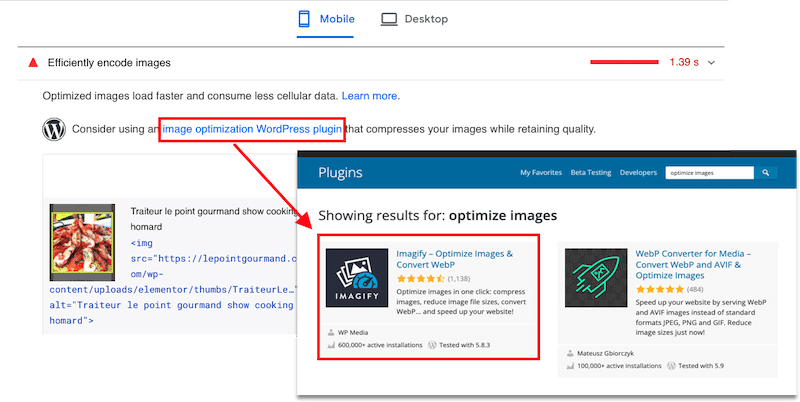
If you still have doubts, PageSpeed Insights also recommends using an image optimization plugin like Imagify:
Wrapping up
Without Imagify, PageSpeed flagged several issues for my images:

When using Imagify, all my image-related issues were fixed. They were optimized in one of the next-gen formats (WebP) and my “efficiently encode images” warning finally turned to green.

If you are like me and you want to efficiently encode your images in WordPress in a few clicks, then why not use Imagify? You can try Imagify for free, optimize your images and run your own audit on PageSpeed Insights, just like I did. Let me know in the comments if you also passed the test thanks to Imagify, I’m curious!


