Looking for an efficient way to convert your images to WebP and…
Do you want to know where to start in your eCommerce image optimization strategy? The goal is simple: create the smallest file size without losing quality. Optimized images make your store faster, improve SEO, and help customers trust what they see before they buy.
Did you know that 66% of shoppers need to see at least three product images before making a purchase? That could end up in a lot of images to upload! That’s why knowing how to optimize eCommerce images is essential for conversions but also performance.
In this guide, you’ll learn what eCommerce image optimization means, the best tools to use, the mistakes to avoid, 10 practical tips to apply right away, and a final tutorial with Imagify.
| TL;DR eCommerce Image Optimization Made Easy Ecommerce image optimization is about balance: fast-loading, high-quality visuals that match your branding, help your store rank better, and convert more shoppers. Customers expect sharp, trustworthy product images that display well on any device and search engines reward eCommerce sites that deliver them. Key Takeaways ✅ Compress smartly to optimize images for performance while keeping a perfect quality. ✅ Use next-gen formats like WebP or AVIF to reduce file size without losing quality. ✅ Resize images before upload to avoid oversized files slowing down your store. ✅ Enable responsive images, lazy loading, and preloading for faster rendering. ✅ Keep consistency in your product visuals and avoid common eCommerce mistakes. ✅ Add descriptive alt text and filenames for better SEO image optimization. ✅ Imagify easily compresses images without impacting quality and convert them to next-gen formats like AVIF or WebP (spoiler: we saved 90% on our file size!) |
How is an Optimized Image for eCommerce?
An optimized image on your eCommerce site should look professional and sharp while loading fast on any device. The goal is to balance quality and performance by avoiding oversized files (no 5 MB product shots), ensuring images are responsive, using a next-gen format, and matching your brand identity. Most importantly, they should support SEO image optimization and never slow down your online store.
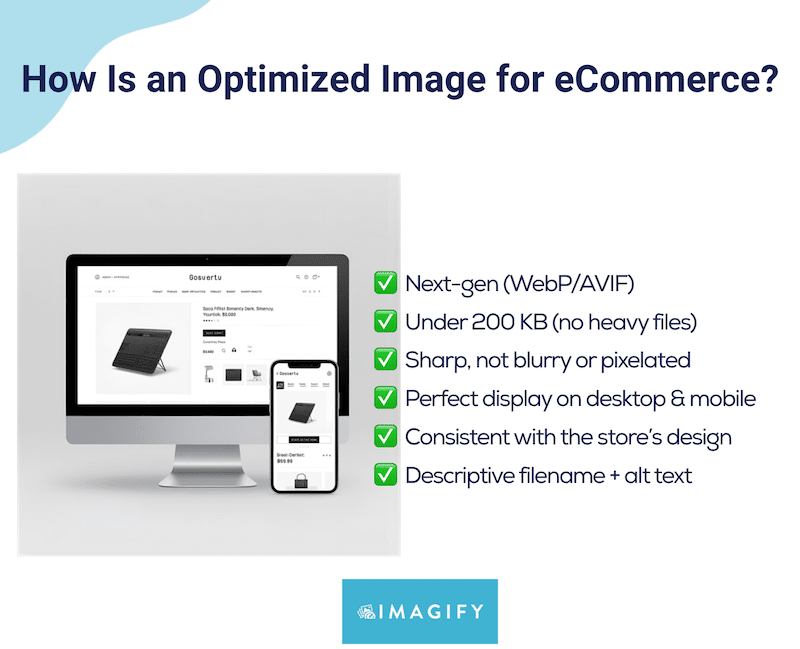
So, is your image really optimized for eCommerce? Pass the test 👇
- Is it lightweight? Your image should be compressed to reduce file size, ideally under 200 KB for product visuals.
- Is the quality preserved? Even after compression, your image should stay sharp, with no blurring or pixelation.
- Is it responsive? It must adapt well to every screen size, from mobile to desktop.
- Is it SEO-friendly? Descriptive filenames and alt text are non-negotiable for better rankings.
- Is it in the right format? Next-gen formats like WebP or AVIF deliver maximum performance.
If you answered yes to all the above, congrats, your image passed the eCommerce image optimization test. If not, it’s time to tweak!
Here’s exactly how to optimize eCommerce images to boost performance and SEO.
10 Ways to Optimize eCommerce Images for SEO and Speed
Optimizing your product photos is not just about making them look good, it’s about improving performance and SEO at the same time. The following techniques will help your eCommerce site load faster, rank higher in search engines, and provide a better experience for your customers.
Here’s how to optimize eCommerce images effectively:
1. Pick the Right Format (WebP, AVIF)
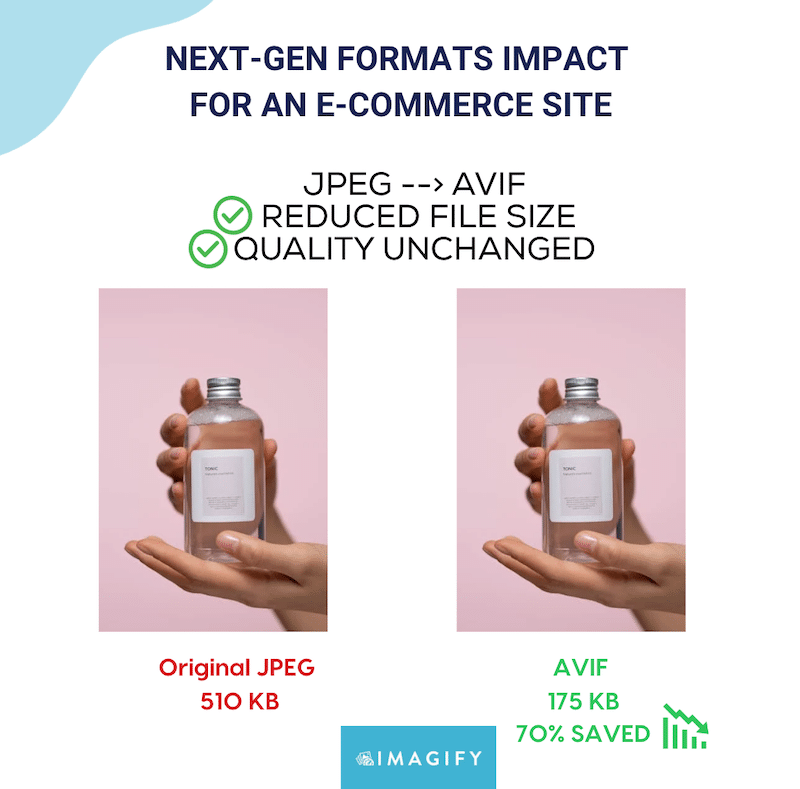
Swap older formats like JPG or PNG for next-gen formats such as WebP and AVIF which offer smaller file sizes without losing quality. That means your product pages load faster while still looking sharp. According to Google’s research, WebP lossy images are 25–34% smaller than comparable JPEG images.
That’s why switching to WebP or AVIF is one of the quickest wins for eCommerce image optimization. You’ll speed up your store, improve Core Web Vitals, and give your site a solid SEO boost at the same time.
For example, a JPEG product image might weigh 510 KB, but the same image in WebP could be only 150 KB with no visible difference in terms of quality.
2. Use the Right Size
Uploading oversized images straight from a camera can slow down product pages. For example, if your WooCommerce product thumbnail is displayed at 300×300 px, uploading a 3000×3000 px version makes the page ten times heavier with no benefit. By resizing to the correct dimensions before upload, your store loads faster and delivers a much better shopping experience.
3. Compress Images Efficiently to Optimize for Performance
Compression reduces file size while keeping images sharp, which is key to both page speed and user trust. On a WooCommerce store, a compressed product image might drop from 500 KB to 120 KB while still looking perfect on screen. That means faster loading, better Core Web Vitals, and more visibility in search results, all without sacrificing quality.
4. Add Descriptive Alt Text for SEO Image Optimization
Alt text is not just about accessibility; it’s also a major factor in SEO image optimization. Search engines can’t “see” images, but they read the alt text to understand what’s displayed.
For instance, instead of uploading a product with the label image1 your WooCommerce store could use “red running shoes for women – Nike Air”. This makes it easier for Google to index the product and show it in relevant searches.
5. Use Responsive Images for Better User Experience
Responsive images ensure that the right file size loads depending on the device. In WooCommerce, this means a desktop shopper sees a high-resolution 1200 px image, while a mobile visitor gets a lighter 400 px version. This optimization reduces wasted bandwidth and improves mobile performance, both key for SEO and conversions.
6. Enable Lazy Loading for Faster Page Rendering
Lazy loading delays the loading of images until they are visible on the screen. On a WooCommerce shop with 30 products, only the first few images load immediately, while the rest appear as the customer scrolls down. This technique cuts initial page load time and helps improve performance metrics like First Contentful Paint, which search engines use as ranking signals.
7. Use a CDN to Deliver Images Globally at Top Speed
A Content Delivery Network (CDN) stores copies of your images on servers worldwide, so customers always load them from the closest location. For example, if your WooCommerce store is hosted in London, a shopper in New York will see images served from a U.S. server instead of waiting for data to travel across the Atlantic. Faster global delivery improves both user experience and SEO.
8. Preload Images to Boost LCP
Preloading tells the browser which images to fetch first, which is essential for improving the Largest Contentful Paint (LCP) score. On a WooCommerce store, you can preload the main hero image on a product page so it appears instantly above the fold. This simple tweak makes the site feel faster to users and directly benefits Core Web Vitals performance.
9. Create an Image Sitemap for Your eCommerce Store
An image sitemap helps search engines discover and index your visuals, which increases your chances of appearing in Google Images. For example, a WooCommerce fashion store with thousands of product photos could drive additional traffic from image search results simply by providing Google with a dedicated image sitemap. This boosts visibility without changing a single product page.
10. Add Structured Data for Product Images
Structured data (schema markup) gives search engines more context about your images and products. With WooCommerce, adding product schema means your images can appear in rich results alongside ratings, prices, and stock availability. Imagine your product image showing directly in Google’s shopping carousel; this not only improves SEO visibility but also drives more qualified clicks to your store.
Similarly, we asked an eCommerce expert about product images, and here’s what André, Full-Stack Developer at FloodReports.co.nz, shared: “To improve our CTR, we worked on making our product images stronger and added schema markup, like product and article types, so they could appear directly in Google search results. It’s a simple change, but it made our listings more attractive and we quickly noticed more clicks coming in“.
Wait, it’s not over yet! Alongside these 10 techniques, make sure you also avoid these eCommerce image optimization mistakes.
Common Image Optimization Mistakes Online Stores Make
Mastering the basics of eCommerce image optimization is a great start, but small mistakes can hurt your store’s speed and sales. Watch out for these common pitfalls:
1. Not Using the Right Format
Professional packshot sessions often produce HD images that look amazing but uploading them in raw formats can kill performance. Imagine a 5 MB product photo, now multiply that by five images per product and 100 products: that’s 500+ images at 5 MB each… a painfully slow site. Always convert your visuals to next-gen formats like WebP or AVIF before uploading.
As Jerome, Lead Developer at Calenzy, explained to us: “We use image optimization for both our mobile app and WordPress sites. The best advice that really impacted performance was switching to AVIF. Using next-gen formats made our apps and sites feel instantly faster without losing quality“.
2. Relying on Stock Photos Instead of Impactful Product Shots
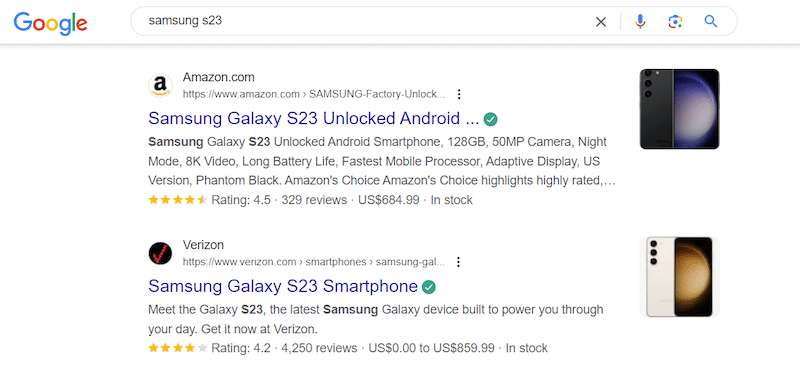
Stock images are often heavy, impersonal, and fail to align with your brand identity. Worse, they often slow down your store. Custom product images not only load faster (if optimized) but also boost credibility and sales. Just look at Google Shopping: product images appear above titles and prices because they grab attention first. If even Google prioritizes images, so should you.
3. Over-Compressing with the Wrong Tool
Yes, speed matters. But if you compress images too aggressively with the wrong tool, you’ll end up with blurry, pixelated product shots. Shoppers won’t trust a product that looks cheap or unclear. The goal is balance: reduce file size while keeping images neat and professional.
4. Inconsistent Product Images
Consistency builds trust. If you edit one product photo with bright colors and sharp contrast, but leave the others untouched, your store looks unprofessional. Apply the same style across all your product images so your store feels cohesive and trustworthy.
5. Not Fitting the Image to Its Container
Uploading oversized images that don’t fit the container wastes bandwidth and slows your site. For example, if your WooCommerce product display is 800×800 px but you upload a 3000×3000 px photo, browsers still load the larger file, slowing responsiveness for no visual benefit. Always resize to the exact container dimensions before uploading.
| 💡 Want more tips? Check out our guide on best practices for product images for eCommerce. |
6 Best Tools to Optimize Your eCommerce Images
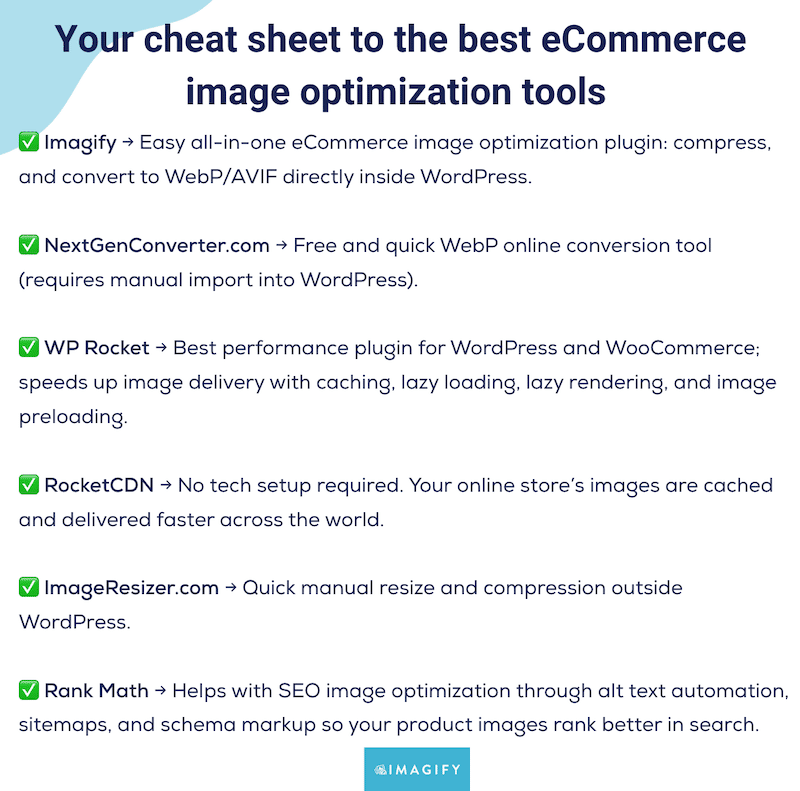
If you want your store to load faster and rank better, you’ll need the right tools. The best solutions for eCommerce image optimization let you easily resize, compress without losing quality, convert to next-gen formats, and improve SEO with features like image sitemaps and structured data. Here are our top picks:
1. Imagify
The easiest image compression plugin for WordPress: intuitive, beginner-friendly, and designed to preserve quality while reducing file size with Smart Compression. It also allows you to convert images to WebP or AVIF with a single click.
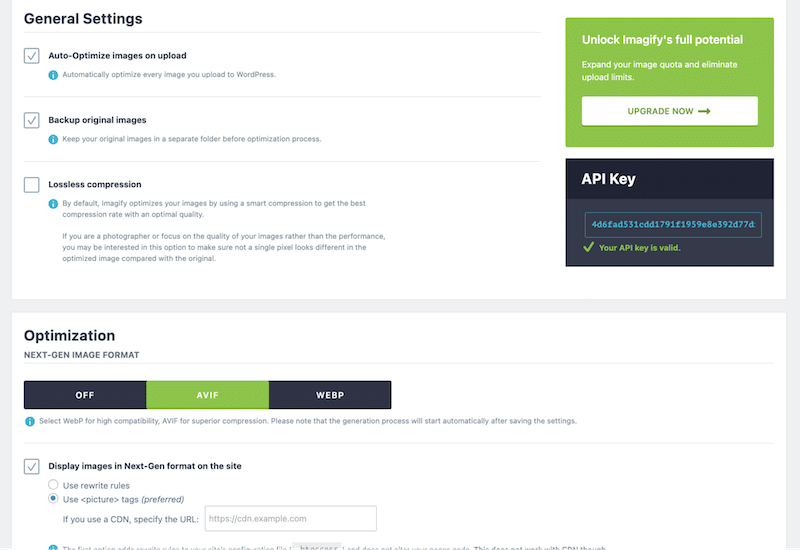
✅ Good if you want a fast, affordable way to compress and convert images directly from your WordPress dashboard, with bulk optimization options for your entire WooCommerce store.
2. FreeConvert.com (Free Online WebP Converter)
A simple drag-and-drop tool where you need to upload your JPG or PNG to instantly convert your image into WebP.
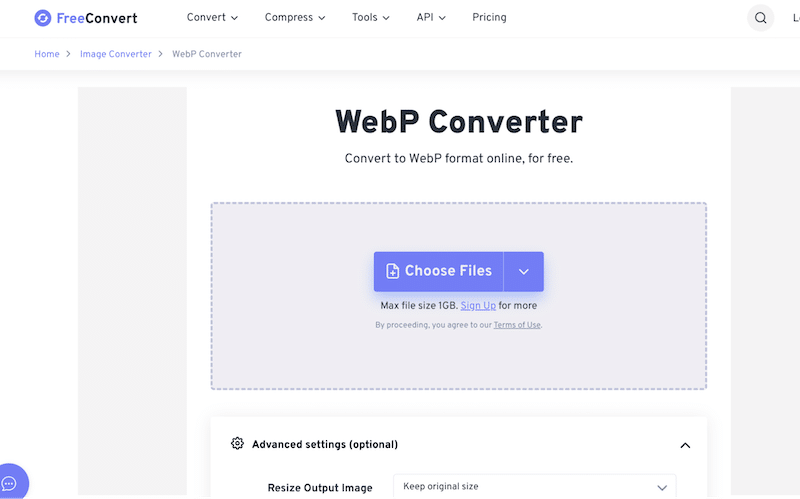
✅ Good if you only need next-gen format conversion without compression. Keep in mind it works outside of WordPress, so you’ll need to re-import the optimized images into your online store.
3. WP Rocket
WP Rocket is the easiest and most powerful performance plugin for WordPress and WooCommerce. It applies 80% of web performance best practices upon activation, including caching, GZIP compression, automatic lazy rendering, critical image optimization, and CSS/JS file minification.
When it comes to images, three features are particularly useful for eCommerce image optimization:
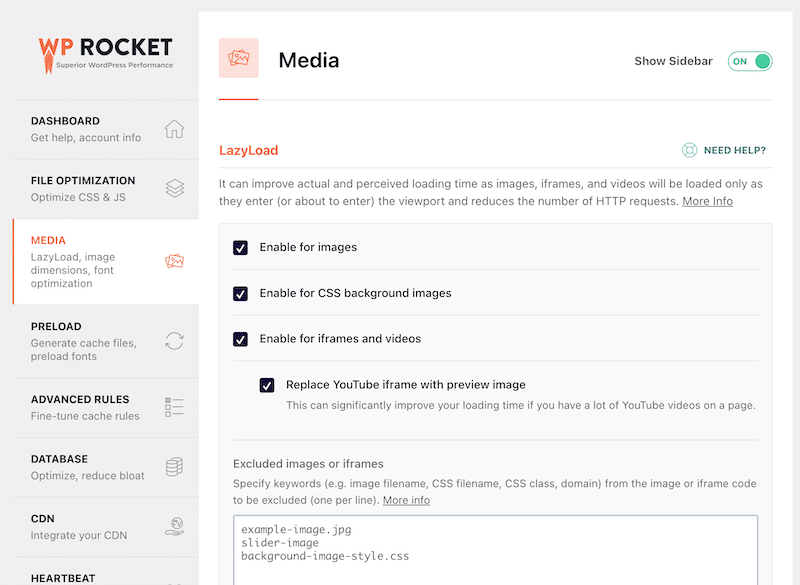
- Caching: WP Rocket creates and stores static versions of your product pages. Instead of dynamically generating each page on the fly, your WooCommerce store serves cached pages almost instantly. This keeps your store fast, even with hundreds of products.
- Lazy Loading: With one click, WP Rocket enables lazy loading for all your product images, videos, and CSS background images. This means they only load when they’re about to be seen, so shoppers can start browsing quickly without waiting for every product photo to render.
- Automatic critical image optimization: This feature allows you to exclude the most important image above the fold, usually your LCP element, from lazy loading so it’s displayed on the visitor’s screen with no delay.
- Automatic lazy rendering: Lazy rendering in WP Rocket means the browser doesn’t load and render every element right away. Instead, it only processes content as users scroll closer to it, and this leads to quicker page responsiveness.
- Preload: WP Rocket can preload key images, such as your main hero or featured product photo, so they appear instantly above the fold. This helps improve your Largest Contentful Paint (LCP) score, which is vital for SEO and user experience.
4. RocketCDN
A CDN (Content Delivery Network) boosts performance by caching your images across global servers. For example, if your store’s server is in London and a customer visits from New York, RocketCDN serves images from the nearest U.S. server (point of presence), cutting down loading time dramatically.
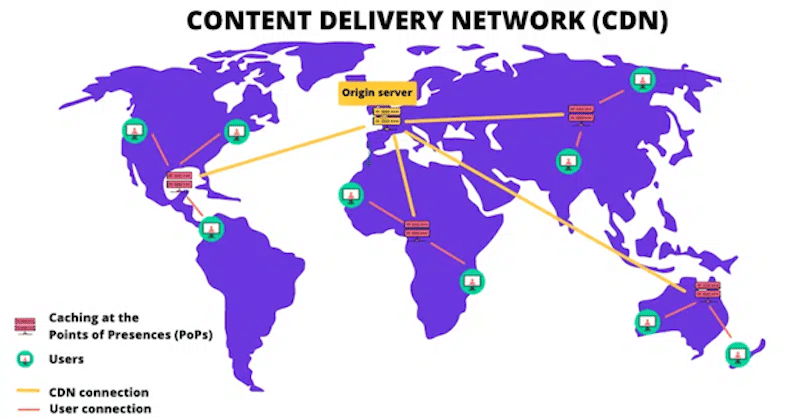
✅ Good if you want a fast, budget-friendly CDN that’s easy to configure with a WordPress plugin and handles all the technical setup for you.
5. ImageResizer.com
A quick online solution to resize and compress images before uploading them to your site. It’s useful if you need to shrink large files on the go.
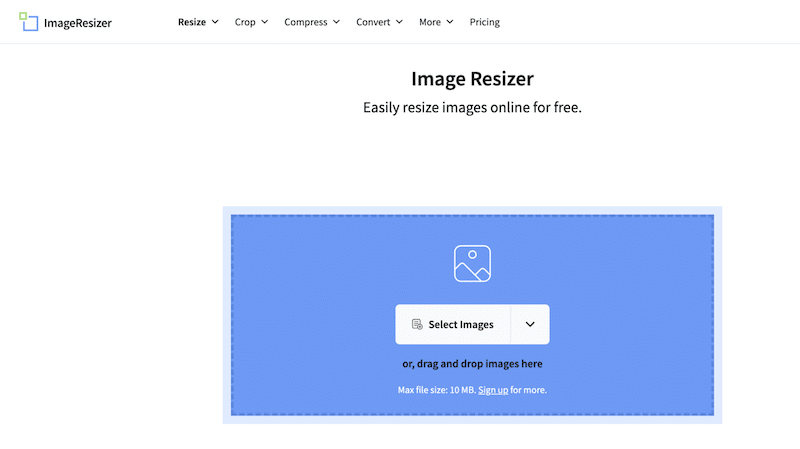
✅ Good if you want to resize images manually before importing them into WordPress or WooCommerce.
Note: it doesn’t support next-gen formats, so conversions need to be done separately.
6. Rank Math WordPress SEO (Image SEO)
Rank Math is one of the best WordPress SEO plugins, and it helps your SEO image optimization strategy. You can create image sitemaps easily and add schema markup to configure product images properly, making them appear in rich snippets on Google.
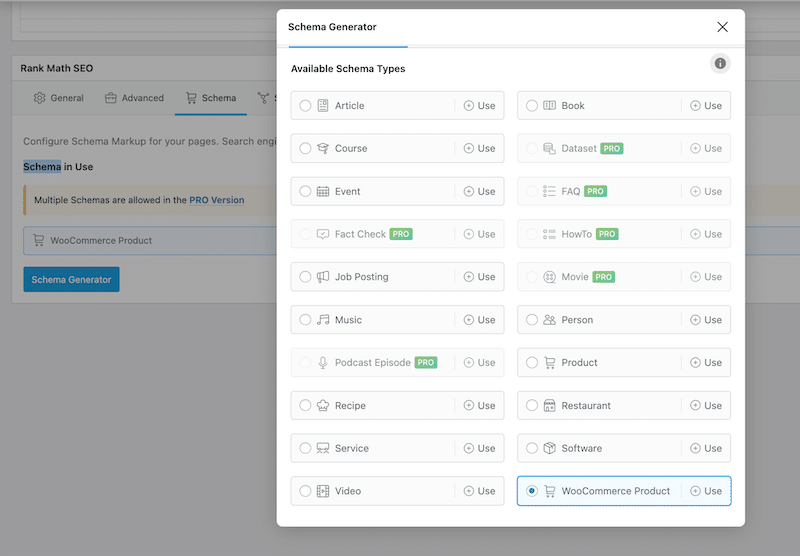
✅ Example: A product with schema markup can display in search with its image, price, and rating, making your store stand out against competitors.
If you’re more visual and prefer a quick reference, we’ve created a handy cheat sheet you can save. It gathers the best eCommerce image optimization plugins and tools in one place.
Optimizing Your eCommerce Images with Imagify
Imagify is the easiest way to handle eCommerce image optimization without impacting quality.
Let’s look at a real scenario: a 375 KB JPG product image uploaded to a WooCommerce product.
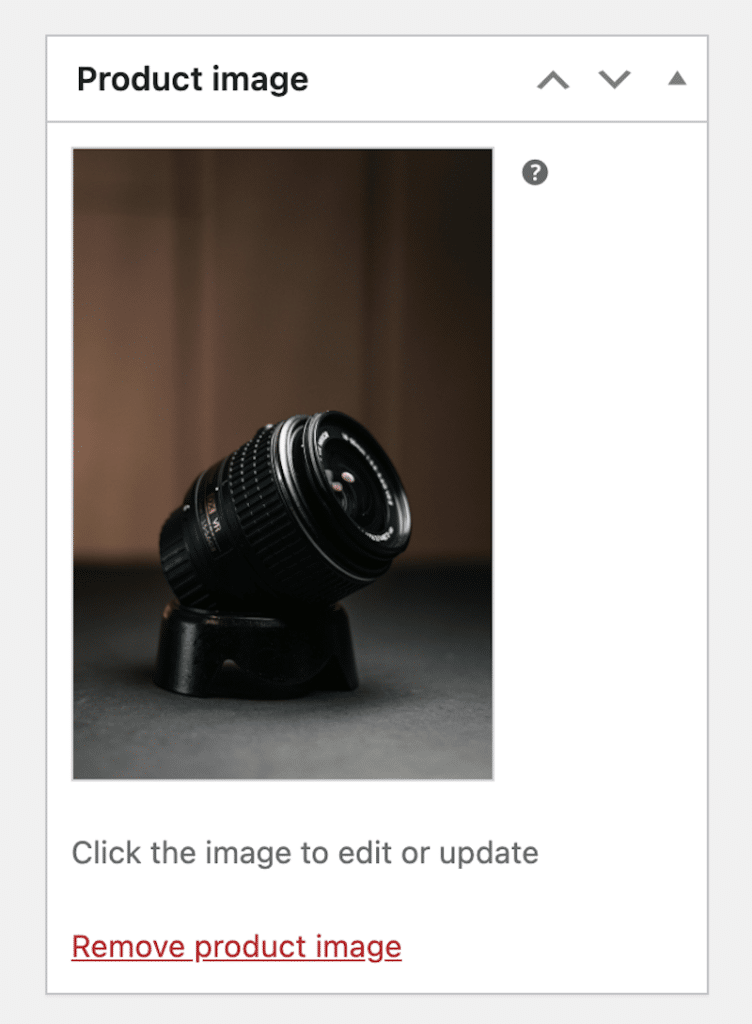
With Imagify, you can compress and convert this ecommerce image to next-gen formats in minutes, keeping it clear and professional while boosting performance.
Here’s how to do it:
- Install the free Imagify plugin from the WordPress repository.
- Choose your options:
- Convert images to AVIF or WebP for next-gen performance.
- Start with Smart Compression: it’s the recommended setting because it gives you the best balance between reduced file size and clear image quality. If you need absolute perfection, you can opt for lossless compression to preserve every detail.
- Enable automatic resizing on upload to prevent oversized files from slowing down your store.
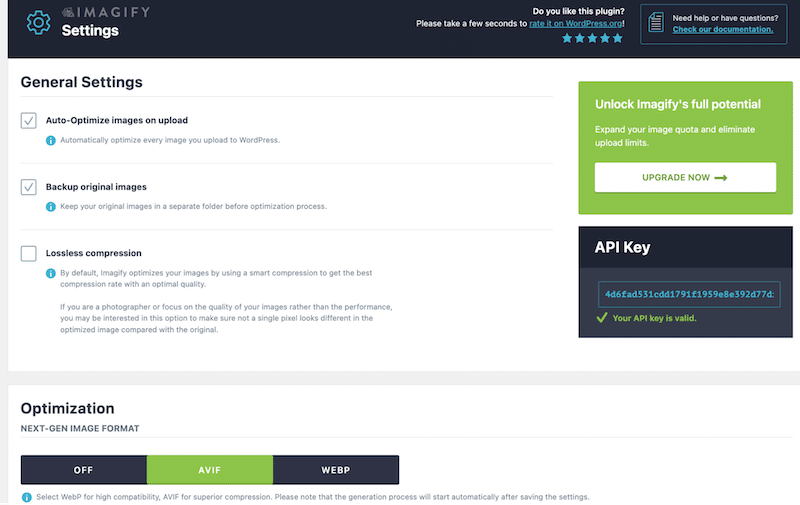
3. Bulk optimize all your images in one click by hitting “Imagify’em all” or go to your WordPress Media Library and optimize product images individually.
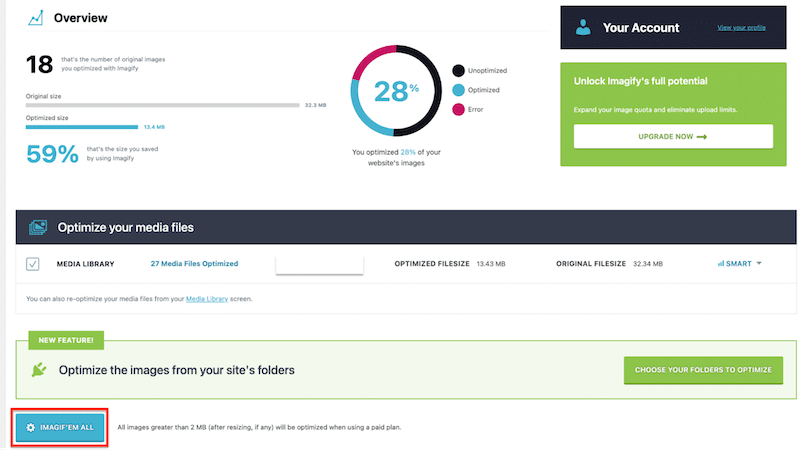
- That’s it! The WooCommerce product image is now compressed, resized, and converted automatically while the quality remains intact:
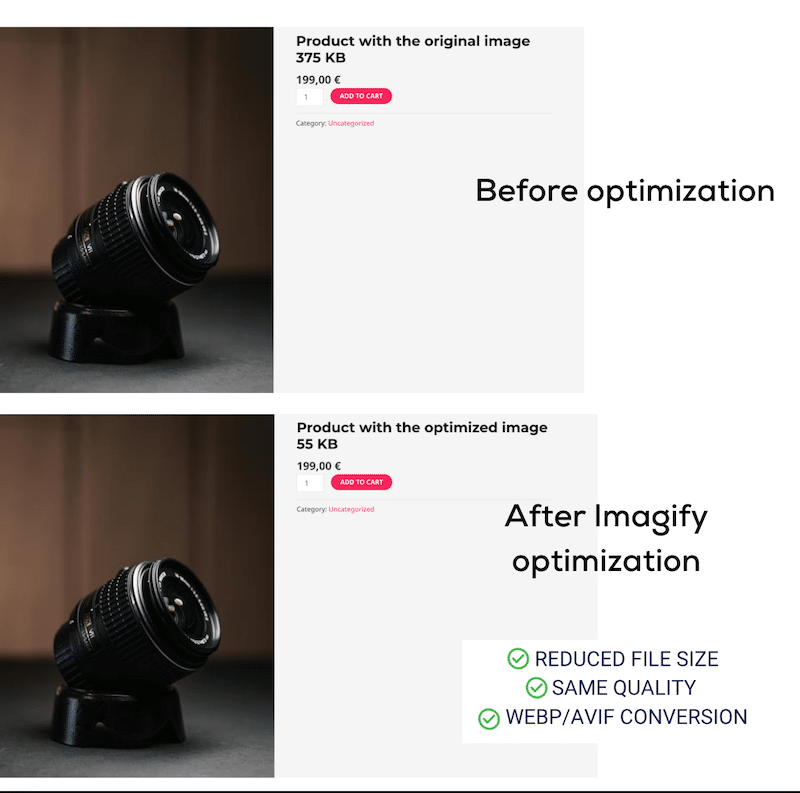
For reference, the original file weighed 375 KB. After running it through Imagify, the file size was downed to 55KB (reduced by 95%) while the image quality stayed intact:

Wrapping Up
This guide is your go-to resource for learning about eCommerce image optimization. You’ve seen the best practices such as choosing the right format, resizing, compressing smartly, adding alt text, enabling lazy loading, and preloading key images. And you’ve also discovered mistakes to avoid, like uploading oversized files, relying too much on stock photos, over-compressing, or being inconsistent with product visuals.
And the easiest way to put all of this into action is with Imagify. It takes just a few clicks to resize, compress, and convert your product images without touching the quality. Plus, it’s free for up to 20 MB per month, so you can try it risk-free. Start optimizing your eCommerce store today with Imagify!

