Looking for an efficient way to convert your images to WebP and…
Do you want to know how to optimize images for page speed and Google? Wise thinking, because unoptimized images can slow down your site and impact conversions!
On top of that, did you know that page loading speed was also a key ranking factor? Serving optimized images instead of large ones boosts performance, keeps users engaged, and improves your position in the search engine results!
In this article, you’ll learn the best image optimization techniques that improve page speed so you can take your site to the next level of performance.
| 🎯 TL;DR: Image Optimization Highlights ✅ The most effective ways to optimize images for page speed are compression, resizing to the right dimensions, conversion to a next-gen format such as WebP or Avif, and lazy loading. Caching, preloading critical images above the fold, and using a CDN for global image delivery are also optimization techniques to make your images lighter. 📈 GTmetrix & PageSpeed Insights are your go-to tools to analyze performance & get optimization suggestions. 📊 The key metrics you should track are page load speed, page weight, number of HTTP requests, and LCP and CLS performance. 🛠 Imagify is the easiest WordPress plugin to compress, resize and convert images to WebP and Avif. Tofurtherr optimize your images and make them load faster, you can also use WP Rocket and RocketCDN. |
7 Easy Image Optimization Techniques to Improve Page Speed
If you want to optimize images for page speed, you should compress, resize, and serve them in the right format, implement lazy loading, and make the browser prioritize the images above the fold. Here’s the full list of image optimization techniques to implement:
1. Convert Images to Next-Gen Formats (WebP of AVIF)
2. Compress Images Without Losing Quality
3. Resize Images and Set Proper Dimensions
4. Implement Lazy Loading
5. Enable Caching
6. Optimize Your Largest Contentful Paint
7. Use a Content Delivery Network (CDN)
Let’s review each technique so you know how to implement them on your site to boost performance.
1. Convert Images to Next-Gen Formats (WebP or AVIF)
Google recommends using WebP or AVIF instead of JPEG or PNG, as these formats provide better compression and faster loading times.
Recommended tools
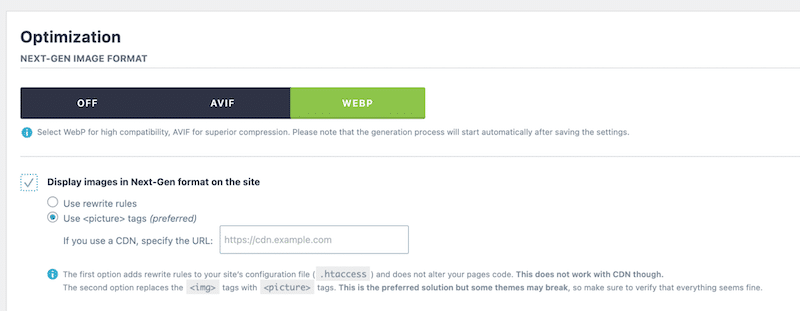
- WordPress plugin: Imagify – The easiest image optimization plugin that automatically compresses and converts images to WebP. It also supports AVIF if you prefer superior compression.
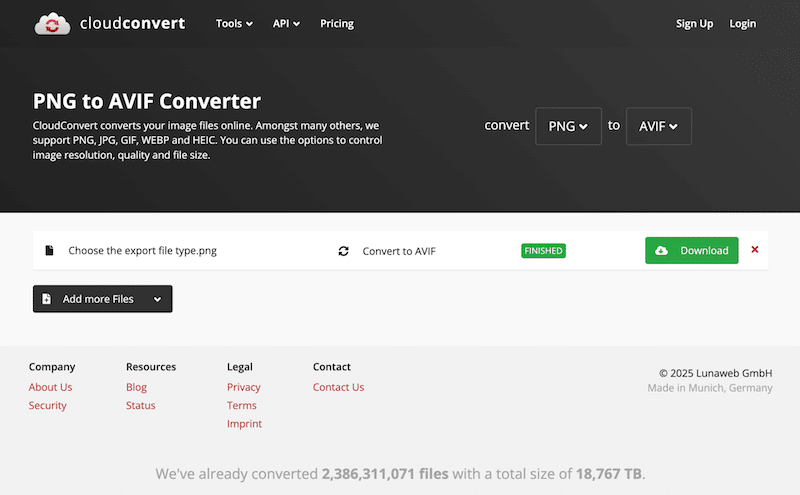
- Online tool: CloudConvert – Drag, drop, convert, and re-upload manually on WordPress.
2. Compress Images Without Losing Quality
Image compression reduces file size while maintaining visual quality.
Recommended tools
- WordPress plugin: Imagify uses the Smart Compression feature to find the perfect balance between quality and file size. It automatically compresses your images directly from WordPress, so you save tons of time.
- Photoshop: steep learning curve and manual upload required)
- Photopea: a simplified version of Photoshop. The solution is free. On Photopea, you can use the quality cursor when you export the file.
3. Resize Images and Set Proper Dimensions
Large images negatively impact performance. Google recommends properly sizing images, especially for mobile.
Recommended tools
- Mac: Use Preview (Tools > Adjust Size).
- Windows: You can use default design tools such as GIMP.
- More advanced tools: Sketch or Photoshop.
Setting image dimensions manually
Ensure the width and height HTML tags are defined as below:
<img src="girl.jpg" width="640" height="360" alt="Girl at the beach" /> 4. Implement Lazy Loading
Lazy loading prevents images from loading until they are visible on the viewer screen, reducing initial page load time. When a user first lands on a webpage, only the images that are immediately visible on the screen load normally.
Images below the fold (not visible yet) have a placeholder and only load when the user scrolls down to view them. This reduces the initial loading time, making the site feel faster and more responsive.
Recommended WordPres plugins
- LazyLoad by WP Rocket (free)
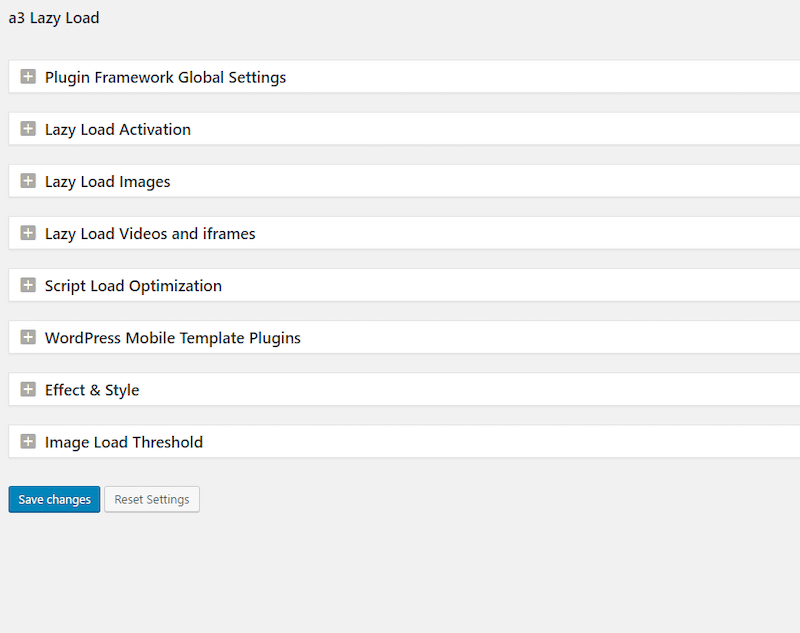
- a3 Lazy Load (free)
- WP Rocket if you want to have access to a full range of speed optimization features.
As an example, here’s how a3 Lazy Load dashboard looks like on WordPress:
Setting lazy loading manually
If you are comfortable with coding and don’t want to use any plugins, simply add the loading=”lazy” attribute on your image:
<img src="image.png" loading="lazy" alt="…" width="200" height="200"> 5. Enable Caching
Caching is a powerful image optimization technique that enhances page speed by reducing the need to download the same images from the server repeatedly. When a user visits a website, their browser downloads and stores images in a temporary storage area (cache).
Since cached images don’t need to be reloaded, this reduces the number of HTTP requests and lowers the burden on the hosting server, resulting in faster load times and improved performance.
Recommended tool
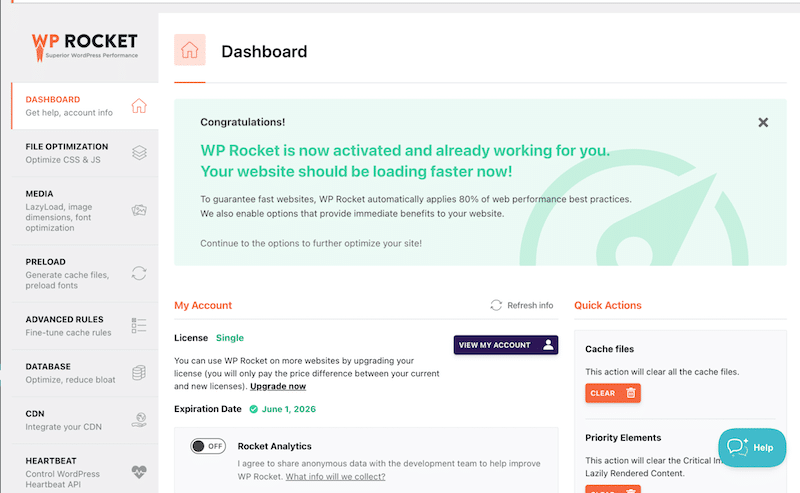
WP Rocket – The WP Rocket plugin provides 80% of performance best practices upon activation, including caching, GZIP compression, code minification, optimization of the critical images above the fold, and automatic lazy rendering. Its intuitive interface also enables powerful features such as removing unused CSS, optimizing CSS delivery, loading JavaScript deferred, and delaying JavaScript execution in a few clicks – without touching any code.
6. Optimize Your Largest Contentful Paint Element
Largest Contentful Paint is one of Google’s Core Web Vitals and plays a role in SEO rankings. It measures how long it takes for the largest visible element on your page—often an image or video—to load. Slow-loading images can negatively impact your LCP score, so optimizing them should help keep this metric in the green.
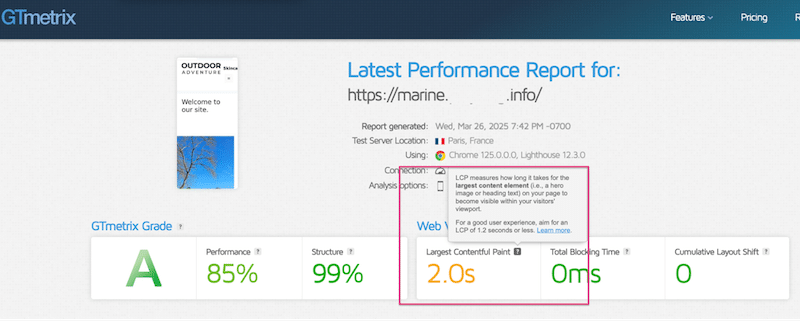
| 💡Hint: A good LCP score means your main content loads quickly, benefiting user experience and SEO. |
Here’s how you can optimize your LCP image to improve page speed:
✅ Preload the LCP Image by instructing the browser to load the image early in the page load process.
✅ Set the right priority on it to tell the browser to render it first. Use the fetchpriority=”high” attribute to indicate that this image is really critical and should be prioritized.
✅ Exclude LCP from lazy loading to not delay image loading. This way, you ensure that the LCP image loads immediately.
Recommended tool
WP Rocket is an excellent tool for optimizing critical content. It comes with a feature called “Optimize critical images”. When you activate the plugin, it automatically applies the above techniques by:
- Preloading the LCP image.
- Setting the fetchpriority=”high” attribute.
- Excluding the LCP image from lazy loading.
7. Use a Content Delivery Network (CDN)
A Content Delivery Network (CDN) speeds up image delivery by storing cached copies of your images on multiple servers worldwide. When a user visits your site, the CDN serves images from the closest server instead of the original hosting server. This speeds up image delivery, reducing latency and improving page speed.
RocketCDN handles automatic CDN configuration without managing DNS records and has a dedicated WordPress plugin.
Now that you know the best ways to optimize images for better page speed, you’re probably eager to put them into action on your site! But before you dive in, take a moment to check out the next section on common image optimization issues. That way, if you run into any challenges, you’ll have the right solutions at hand to fix them quickly.
Troubleshooting Common Image Optimization Issues
Sometimes, you start the image optimization process but don’t see any improvement in performance or even in file size. This can happen due to various issues, and here are the most common ones along with quick fixes:
❌ Images remain large after compression.
✅ Check if your compression settings are too light and use a more aggressive compression level.
✅ Make sure to use lossy compression and not lossless for better savings.
✅ Ensure that your images are converted to WebP or AVIF.
❌ Blurry or low-quality images.
✅ Avoid excessive compression that could reduce clarity. If you are using Photoshop, decrease the compression level when exporting your image.
✅ Use lossless compression for images that need high quality.
✅ Check that your original image has a high resolution to start on a good base.
❌ Lazy loading causes images to load too slowly.
✅ Exclude above-the-fold images (especially LCP) from lazy loading.
❌ Largest Contentful Paint (LCP) image loads too late.
✅ Preload the LCP image so it loads earlier.
✅ Set fetchpriority=”high” to prioritize it and tell the browser to focus on this one.
✅ Make sure it’s not lazy loaded.
❌ Slow image loading despite CDN use.
✅ Check in your settings if CDN caching is properly enabled.
✅ Verify that the correct image format is served based on the user’s device.
❌ Page speed tools like GTmetrix still flag image optimization issues.
✅ Clear your browser cache and start a new incognito window.
| 💡Here are the three golden rules to check after image optimization: 1. Always verify that your image file size is indeed smaller. 2. Go to the front end to check that the image quality is still OK. 3. Run an audit on PageSpeed Insights or GTmetrix to check if the flagged issues are gone. |
Understanding the Impact of Images on Page Speed
According to Google, optimizing images for page speed is important for rankings and user experience. Image optimization should be part of your entire marketing strategy if you want to rank well, boost conversion, and keep customers engaged.
Did you know that a large volume of unoptimized images is usually the culprit behind a slow website? Here’s how images impact performance:
1. Images Are One of the Most Consuming Resources on a Web Page
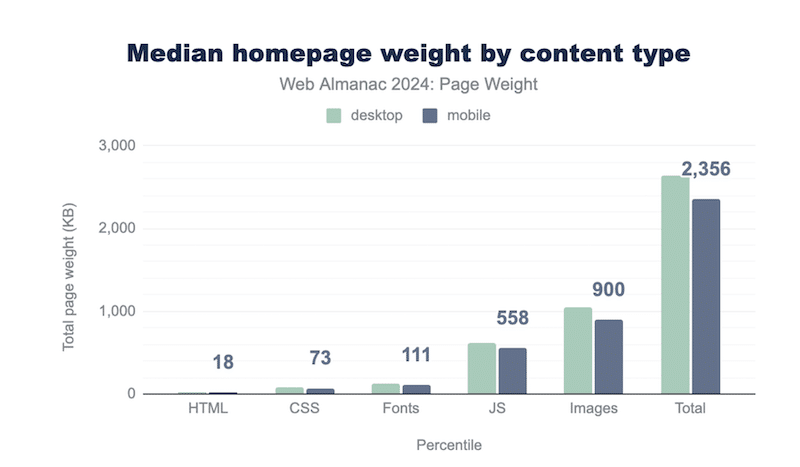
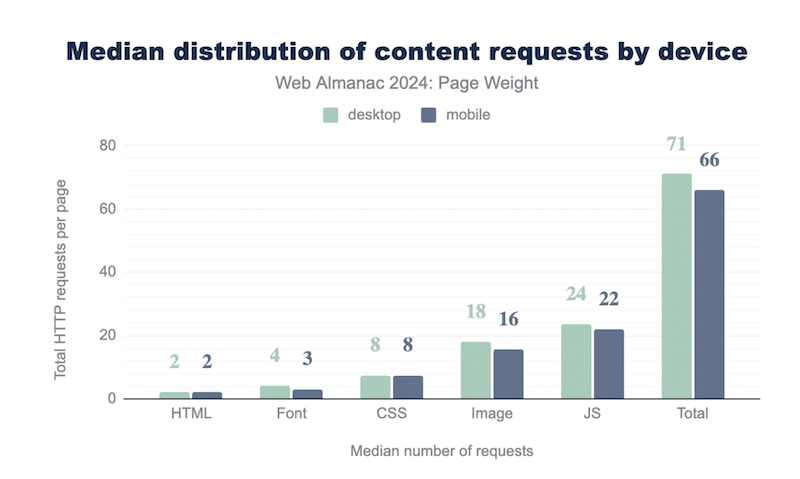
Large images can make your website slow and upset your visitors, who expect to access the information as soon as possible. As shown in the figure below, along with JavaScript, images are the dominant consuming resource in a web page:
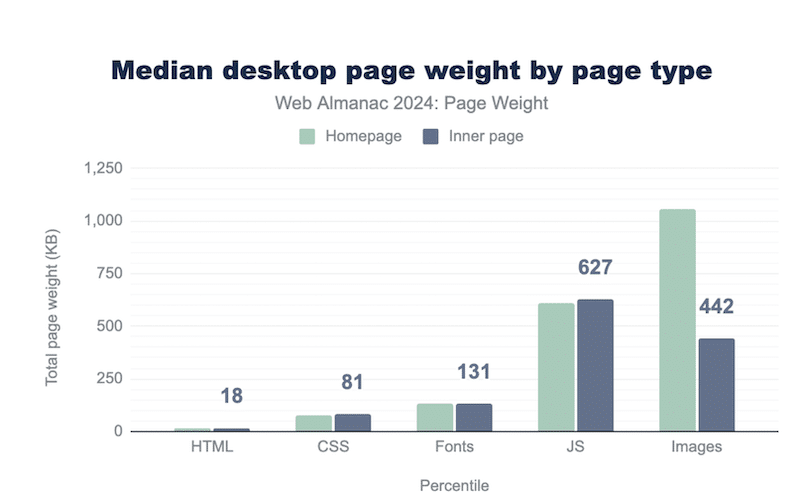
Images are a great source of page weight and make up the largest number of HTTP requests on your homepage.
2. HTTP Requests Are Mainly Coming from Images (and JavaScript)
Additionally, when a visitor lands on your site, your browser has to request and download some files to render the content. An HTTP request is made to the server for every single file, including images.
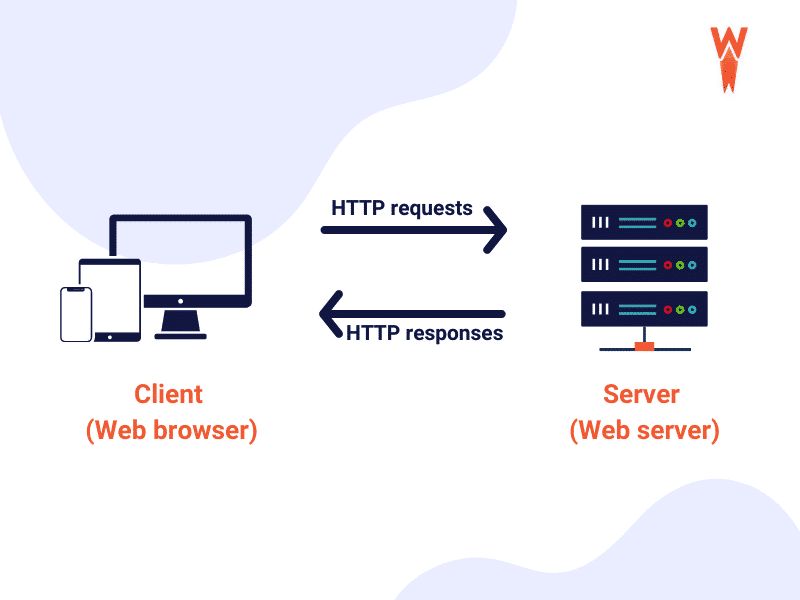
The heavier resources you have, the more requests your browser will need to make. Optimizing your images and making them smaller will reduce the size of the HTTP requests, resulting in a faster-loading site.
It’s no surprise that in 2024, HTTP requests were mainly coming from JavaScript and… images.
3. Unoptimized Images Impact Core Web Vitals
Images influence Core Web Vitals, especially Largest Contentful Paint (LCP) and Cumulative Layout Shift (CLS)—two key metrics that measure page speed and visual stability.
Core Web Vitals are a set of performance metrics introduced by Google to evaluate user experience. They are part of Google’s ranking algorithm and can impact SEO and search visibility.
- LCP (Largest Contentful Paint) measures how long it takes for the largest visible element—often an image or video—to load. If images are not optimized, they can delay LCP and negatively affect page speed.
| 💡 Hint: If you follow our seven recommendations, improving LCP becomes much easier. Use modern image formats like WebP and AVIF, serve responsive images to save bandwidth, preload and set fetchpriority for key images, and, of course, compress them. |
- CLS (Cumulative Layout Shift) tracks unexpected visual shifts on a page. If images don’t have defined width and height attributes, the browser doesn’t allocate space properly, causing content to move as the images load.
If you want to rank well on Google and provide a great user experience, you need to focus on your Core Web Vitals—and image optimization is a great starting point.
Measuring the Impact of Image Optimization on Page Speed
How can you tell if your image optimization efforts are truly improving your site’s performance? The best way is to measure key performance indicators (KPIs) before and after optimization. To do so, you can use GTmetrix and PageSpeed Insights, two performance tools powered by Lighthouse, which evaluate loading speed, Core Web Vitals, and other key metrics.
Follow this seven-step approach to track the impact of image optimization effectively.
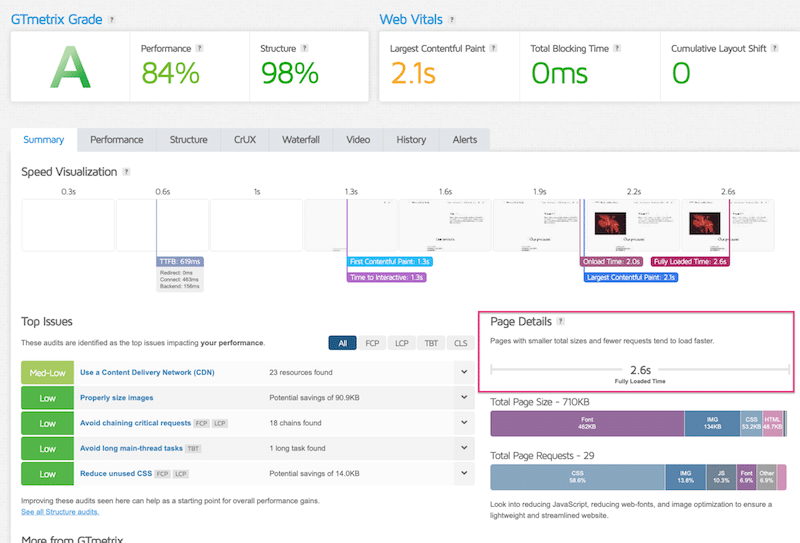
Step 1. Analyze Your Current Site with GTmetrix (Before Optimization)
Before optimizing your images, run a test on GTmetrix and take note of the following KPIs.
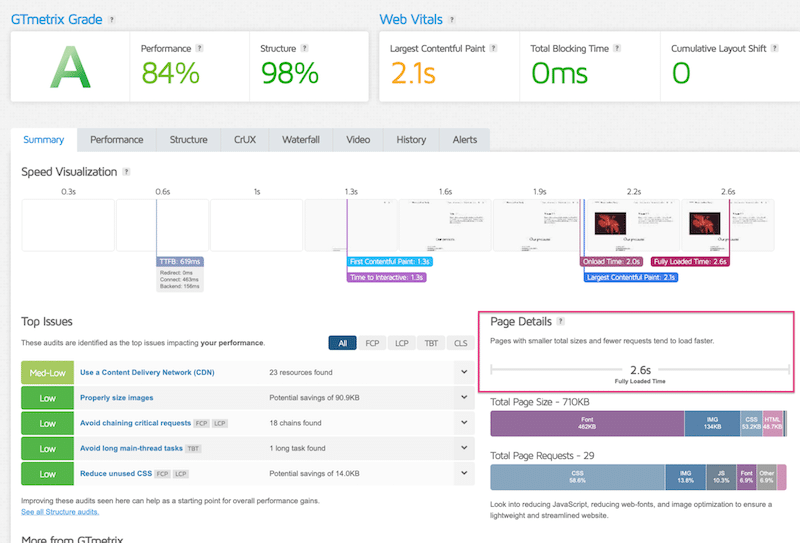
Step 2. Check the Fully Loaded Time
Measure how long it takes for your page to load completely. Compare the results before and after optimization to see if your images improve your page speed.
Step 3. Check the Largest Contentful Paint (LCP)
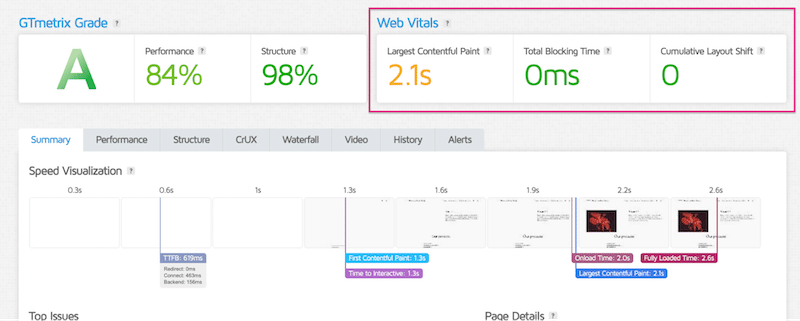
LCP measures how long it takes for the largest visible element on your page—often an image or video—to load. Since LCP is a Core Web Vital and affects SEO, optimizing your images should help reduce this time. Compare your LCP score before and after optimization to ensure improvements in loading speed.
Step 4. Check the Cumulative Layout Shift (CLS)
CSLS measures how much your page layout shifts unexpectedly while loading. If images lack defined width and height attributes, they can cause elements to move, negatively affecting user experience. After optimization, check your CLS score to confirm that your page’s stability is better.
Step 5. Check the Number of HTTP Requests
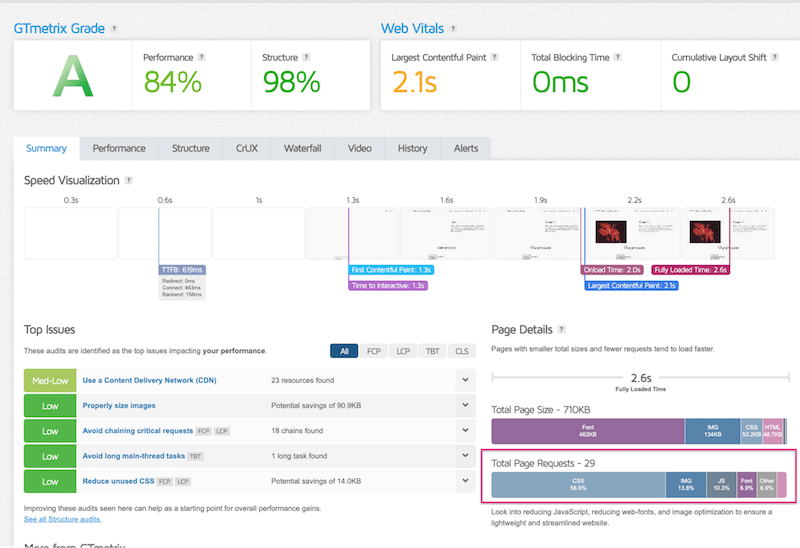
Each image on your site generates an HTTP request, and too many requests can slow down loading times. Compare the number of requests before and after optimization to ensure that your images are properly optimized. The HTTP requests made by images should decrease after optimization.
Step 6. Check the Page Size and the Weight Occupied by Images
Images often account for a significant portion of a page’s total weight. Check how much space they take up before and after optimization to confirm that compression and format changes have reduced their impact.
Step 7. Run a New Performance Report on PageSpeed Insights
In addition to GTmetrix, use PageSpeed Insights (PSI) to analyze your site’s performance. Before optimizing, note any image-related warnings, such as oversized images or unoptimized formats, as shown below:
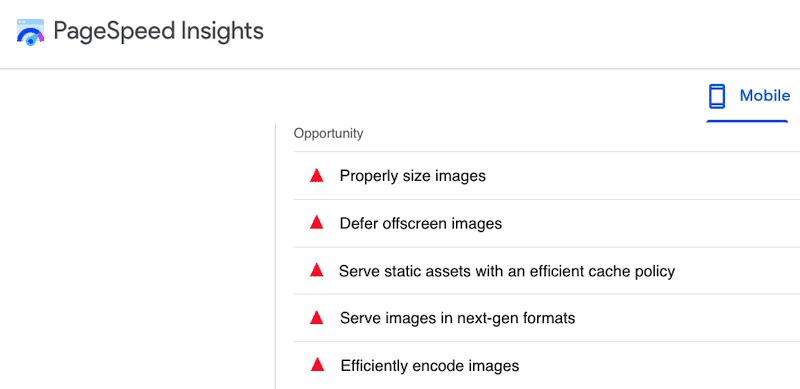
If your optimization is successful, these red flags should move into the “Passed Audits” section.
Optimizing Images to Improve Speed: a Case Study
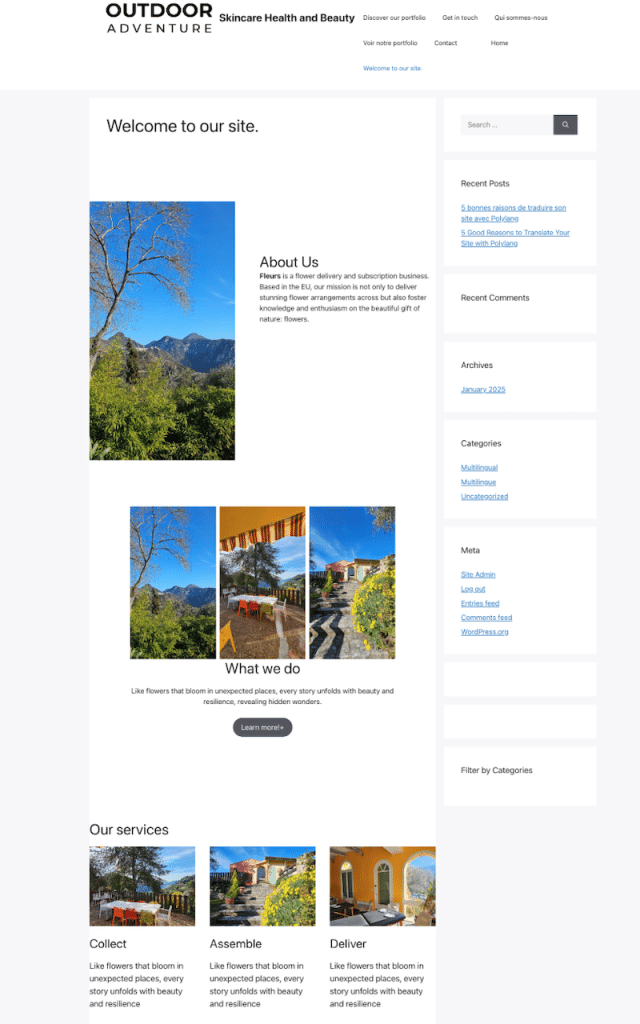
To measure the real impact of image optimization on page speed, we ran a performance test before and after optimizing images. We built a test homepage containing unoptimized images and sections such as “About Us,” “What we do,” “Services,” “Testimonials,” and “Pricing Table.”
Test Conditions
- Device: mobile, iPhone13 (4G)
- Server location: Paris
- Testing tool: GTmetrix
- Optimization tool: Imagify
- KPIs used: image file size, fully loaded time, Largest Contentful Paint, Page weight, HTTP requests, and the recommendations audit area called “Top Issues.”
Performance Results
Let’s go over each KPI before and after optimization so you can see how Imagify helps for page seed and overall performance. Let’s get to the data!
#1 Image File Size
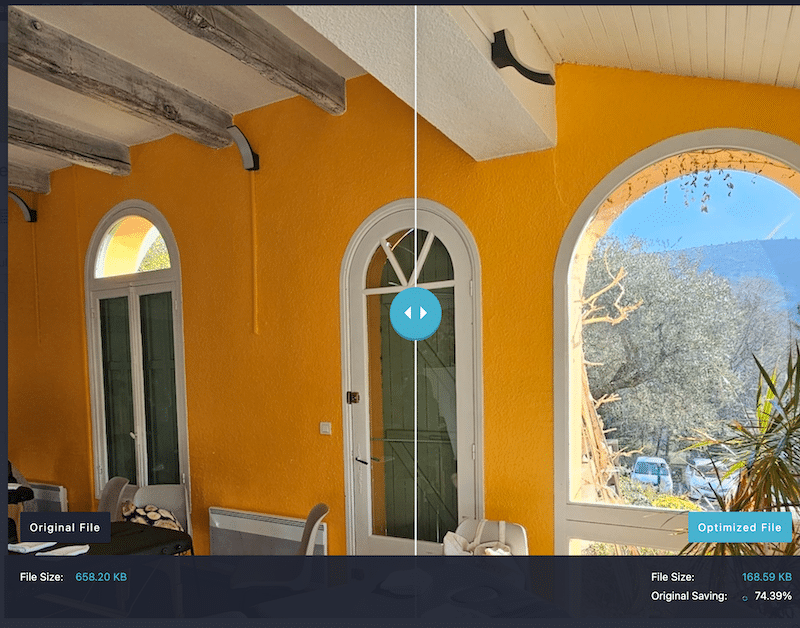
We used Imagify to compress images and convert them to WebP. Here are the optimization results on the images’ file sizes:
| Image file size before optimization | Image file size after optimization with Imagify | % saved thanks to Imagify |
| 535 KB | 230KB | 58% |
| 658 KB | 158 KB | 76% |
| 950KB | 211KB | 78% |
| 1MB | 252KB | 75% |
| 1.11MB | 283 KB | 75% |
Imagify makes the optimization and the WebP conversion very easy and convenient. Everything was automatic and done from the WordPress dashboard:
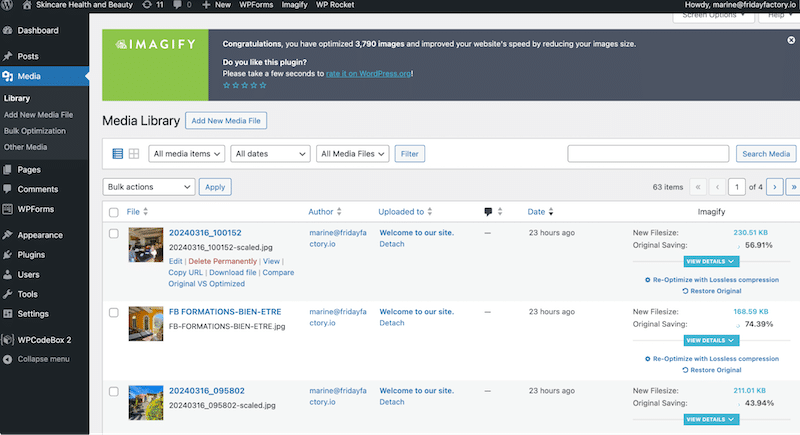
It’s worth mentioning that the file sizes are smaller and served in WebP, and the quality is intact.
#2 Performance KPIs From GTmetrix
| KPI | Before Image Optimization | After Image Optimization with Imagify |
| Fully Loaded Time | 3.6 s | 2.6 s |
| Largest Contentful Paint (LCP) | 2.0 s | 1.8 s |
| Page Weight | 2.20 MB | 1.02 MB |
| HTTP Requests | 13 | 12 |
| % HTTP Requests Triggered by Images | 31% | 25% |
| GTmetrix Audit Issues | Image-related issues detected 
| No image-related issues |
Key Takeaways
After optimizing images with Imagify, we observed the following improvements:
- The image size is significantly reduced, with an average of 70% savings while maintaining image quality.
- A faster page load time, improving from 3.6 s to 2.6 s.
- A lighter page weight, reduced from 2.20 MB to 1.02 MB.
- Fewer HTTP requests, decreasing from 13 to 12, reduced server load and improved speed.
- An Improved Largest Contentful Paint (LCP), meaning the main content became visible faster.
- GTmetrix confirmed that previous image-related warnings were resolved. Imagify fixed the “Serve images in next-gen formats” and the “Efficiently encode images” warnings.
Wrapping up
Now that you’ve learned how image optimization impacts page speed and performance, you’re ready to take action to improve page speed! By following these best practices, you can significantly improve load times, user experience, and SEO rankings.
You’re not alone in this process—powerful tools like Imagify can do the heavy lifting for you. With Imagify, you can:
✅ Compress images automatically without losing quality,
✅ Convert images to WebP and AVIF for faster delivery,
✅ Optimize images in bulk, saving you time and effort.
For even better results, combine Imagify with WP Rocket to easily handle caching, lazy loading, and more advanced performance optimization.
Try Imagify for free—compress up to 200 images per month with the plugin or test the free online tool to reduce file sizes without installing a plugin. Start optimizing your images today and boost your website’s page speed!


