
Looking for an efficient way to convert your images to WebP and…
As fellow web users, we know we are not reading every single word of a blog post – we rather tend to “scan” the page. As a result, the visual aspect is also crucial to building trust and authority amongst visitors. Performance and conversions rely heavily on the choice of images, so we have listed 6 best practices to add optimized pictures to your blog posts.
Let’s dive in!
Why You Should Choose Well Your Blog Images
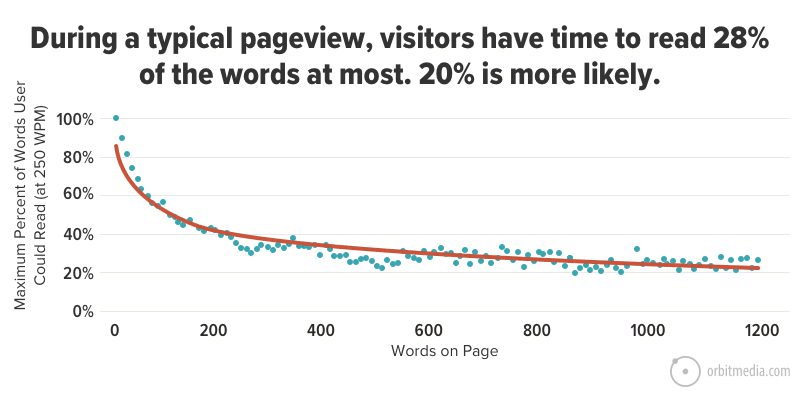
A typical visitor will read only around 20% of the words on your blog post. Therefore, it is essential to add relevant visuals to catch its attention a bit longer. The chart below shows the maximum amount of text users could read during an average visit to pages with different word counts.
So if users are not going to read the entire content, they will have a look at the layout, design, and, of course: the images. Here’s why you should carefully choose your images for your next post:
1. High-quality website images build trust and authority in your company and brand
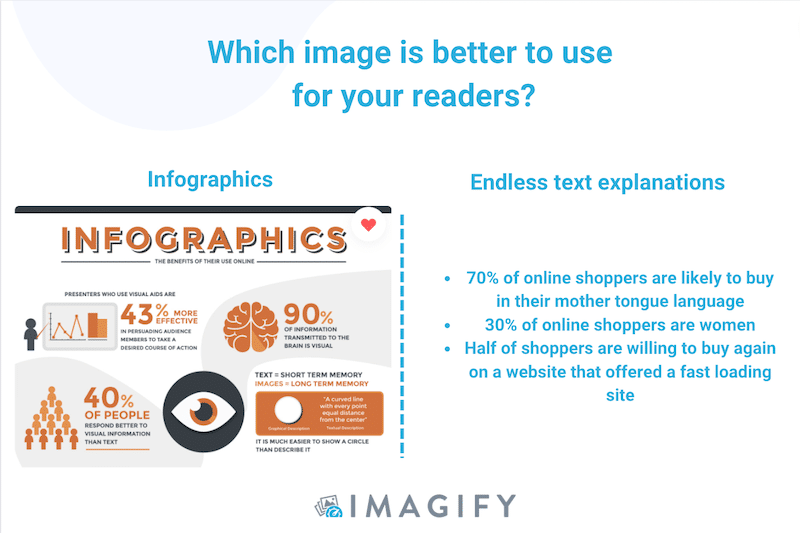
Trust should be the ultimate marketing goal when building a website or writing a blog post. You want the readers to take you seriously, advocate for your company and ultimately, purchase your products. How to achieve trust? Customers are more likely to have confidence in someone they consider to be an expert on a topic, and this authority is built through the design, your choice of words, colors, logo, and of course, the images. Infographics are ideal for boosting credibility and helping grasp the idea in a few seconds only.
2. Images can make content stand out and be more memorable
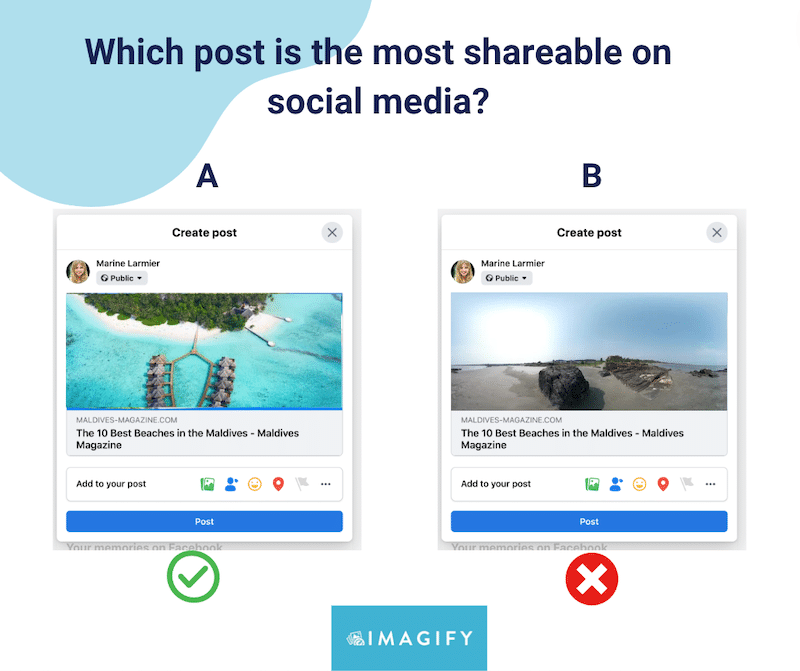
Always try to select photos that make the reader willing to share them on social media. For example, which blog post would you share on Facebook if you want to announce your next trip to the Maldives? When we think about this destination, post “A” has a more attractive photo than post “B”.
3. Pictures help to illustrate what you want to say with your words
You may have heard the popular adage “one picture is worth a thousand words” which means that a single image can convey complex ideas. That’s exactly what your images should do: reinforce your written idea from a visual perspective.
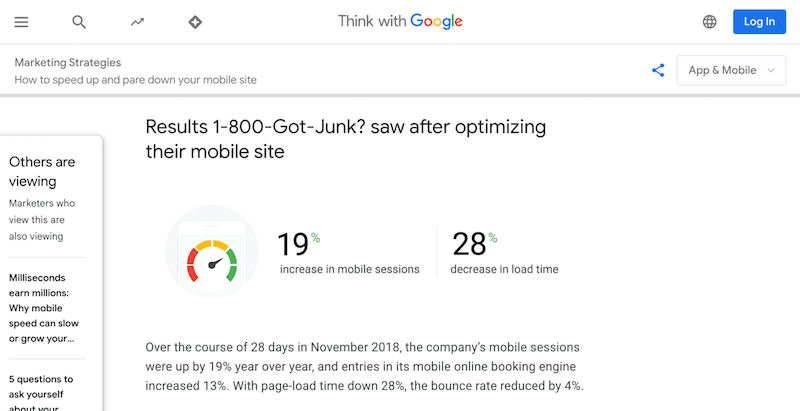
For example, if you are writing about data-driven facts, it may be helpful to create key figures visuals like Google is doing on its blog:
The last piece of advice about choosing the right image is to select the ones that will not impact the performance of your blog and that will boost your SEO. That takes us to the next section: our 6 tips to ensure your images are perfectly optimized before publishing them.
6 Best Practices for Your Blog Images
Here are 6 best practices to follow before uploading images on your blog. They’ll be useful for your next article, especially if you want to ensure performance, reinforce your SEO and avoid any copyright issues.
1. Choose the Right Image Size and Format
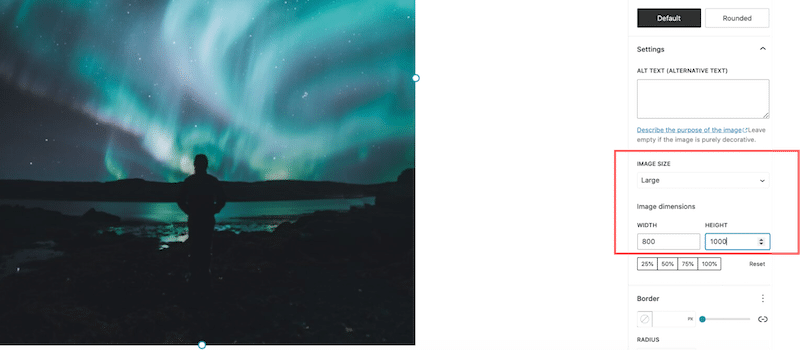
Choosing the right image size and format is crucial to avoid performance issues. When you have created the perfect infographics or selected the right photo, remember to check the final size of the file. For a blog post, we recommend you use a maximum width of 800px for your images.
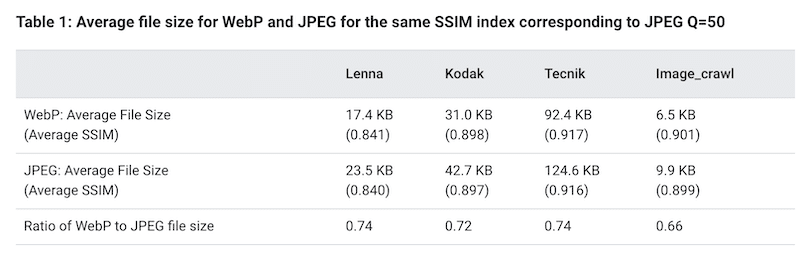
Regarding the format, we suggest you use next-gen formats such as WebP or AVIF instead of the traditional png or JPG. For the same quality, Google observed that the average WebP file size was 25%-34% smaller than the JPEG file.
💡Solutions to convert images to WebP:
- Online tools like xConvert – you can convert your images to WebP in a few clicks and upload them to WordPress manually later on.
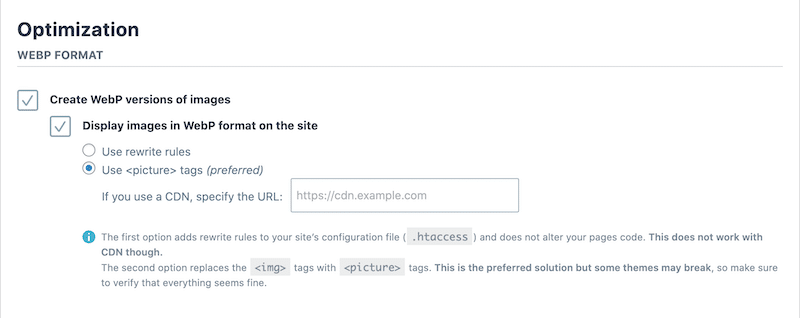
- WordPress plugins like Imagify – which allows you to convert images to WebP or Avif.
| If you want to learn more, we have two insightful guides dedicated to the best image size on the web, as well as the best image formats. |
2. Compress Your Largest Images
Compressing large images is essential to maintain a good performance and a fast-loading page. However, you don’t want to compromise on quality either. That’s where compression (with the right tool) comes in handy!
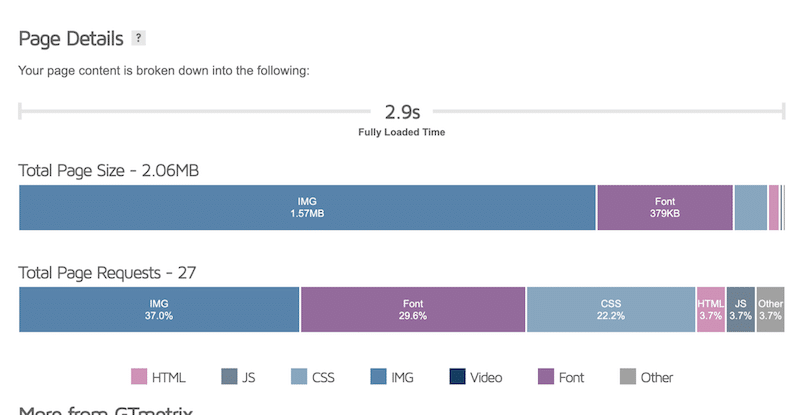
Ideally, you want to keep your page weight under 1 – 1.5 MB. You can audit your site and check this metric on GTMetrix > Page Details > Total Page Size.
💡Solutions to compress your large images:
- Photoshop and Lightroom, but you may reduce the quality when exporting the final images.
- The Imagify plugin – allows you to optimize and compress your images in bulk directly from WordPress. You can save up to 90% on file size while maintaining high quality.
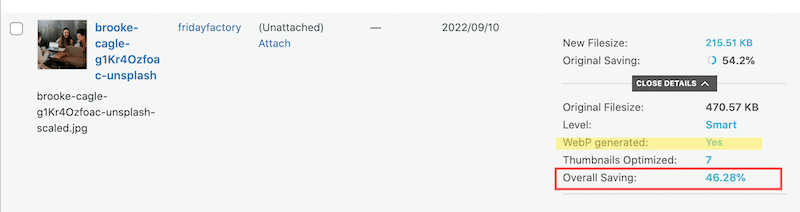
In our example below, Imagify compressed the image by almost 50%, making the page much lighter.
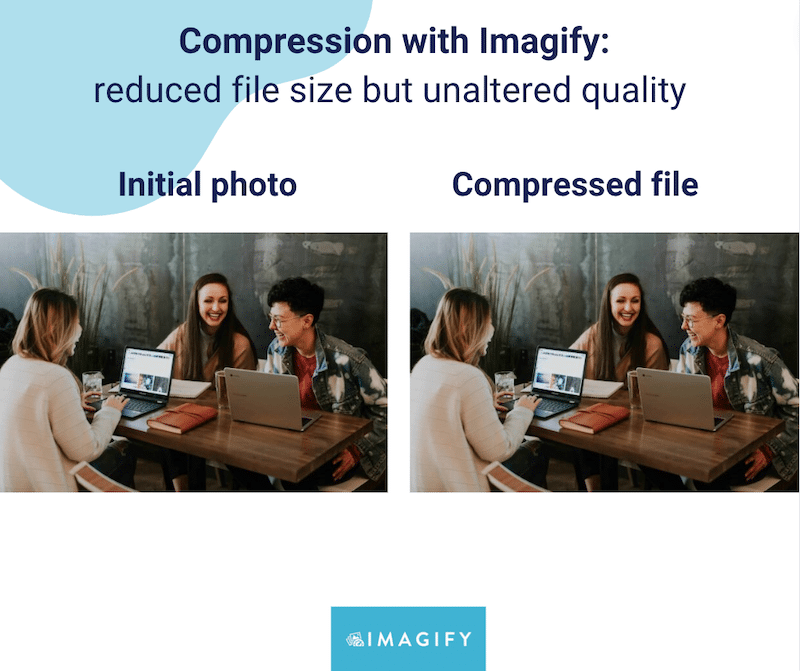
Imagify also preserves the quality. We can’t tell which image is the compressed one:
| 📖Good to know: Imagify helps you optimize your images for somePageSpeed Insights audits. |
3. Use Responsive Images
Another advice before publishing your blog post is to make your image responsive. Luckily, many page builders come with the option to serve images according to the device of your choice.
💡Solutions to use responsive images:
- Manually, with code – using the “srcset” and “sizes” attributes to make images responsive.
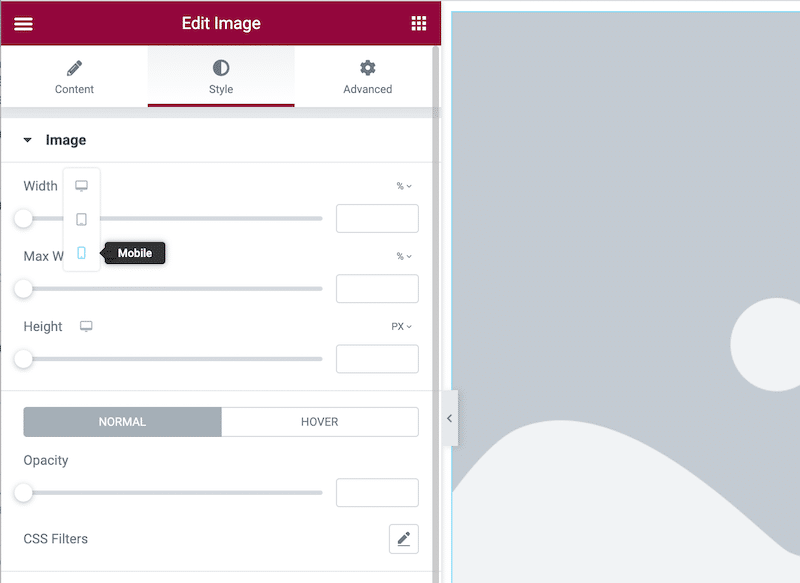
- Using the Block Editor or any page builders that allow you to display different image sizes according to the device:
| 📖 Check our guide to learn more about how to make images with responsive design. |
4. Rename Your Image File Properly And Use the Alt Tag
Images with descriptive names and alt tags will be more likely to be found by search engines – increasing your chance to appear in the search results. Alt tags are useful for SEO because Google cannot interpret images (yet). Therefore, the alt tags solve this by indicating what the image is about.
Tips for using the right file name and alt tag:
Regarding the file name, here are a few guidelines:
- Describe concisely what the image is about to help users find your image
- Use a maximum of 4-5 words
- Capital letters are not needed
- Use a hyphen (-) not underscore to separate each word from each other.
For the alt tag, keep the text short to maximize its impact, and don’t forget to mention the topic in the alt text.
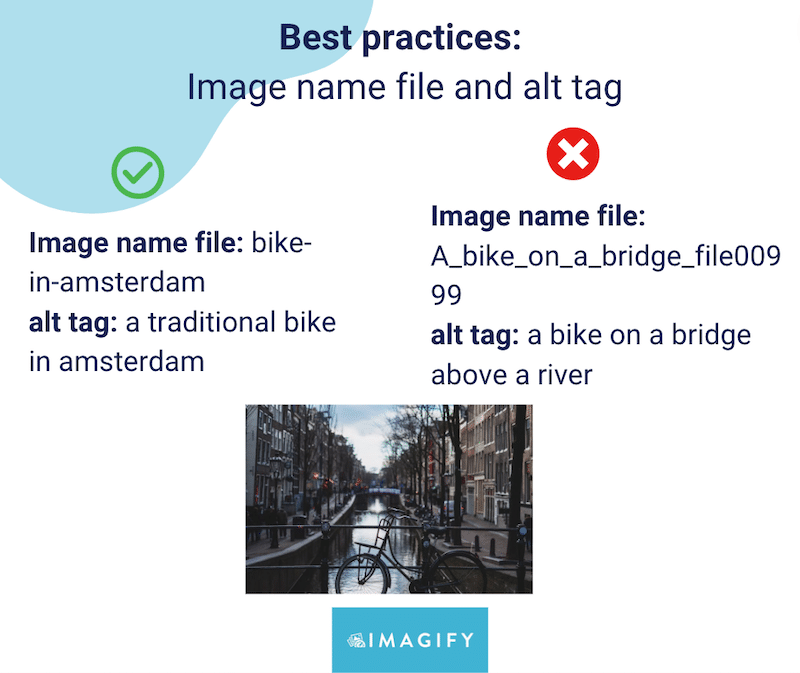
In the example below, you can easily see the differences:
5. Pay Attention to Copyright Issues
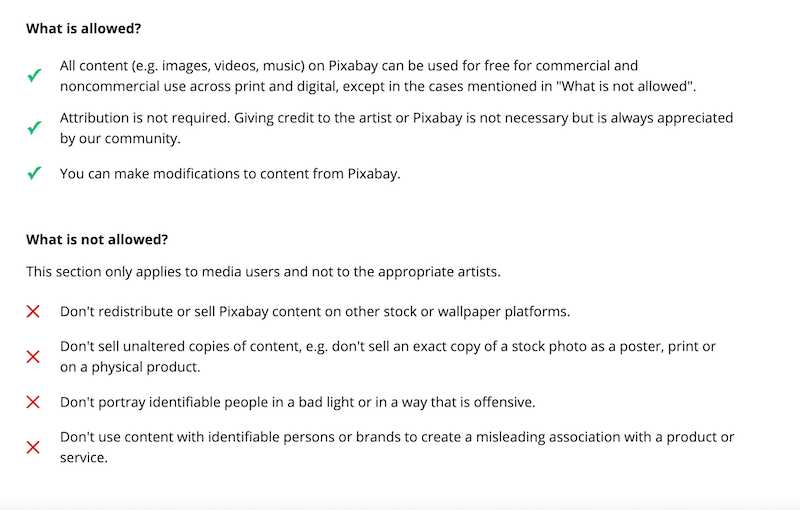
Now that you have found the perfect relevant image for your blog post. It’s also time to check the copyright on it. Usually, there is a note next to the image with a “©” and you may not be able to use it for your blog. In case of doubt, always check with the photographer or designer if you can reuse the work and, eventually, credit them.
For example, if your image is coming from Pixabay, the dos and don’t for the copyright-free content are below:
6. Create an Image Sitemap
An image sitemap is the best way of telling Google about all the images on your site. It’s invaluable for indexing your images and ensuring they are included in search results.

💡Solutions to create an image sitemap:
- Use a WordPress plugin like XML Sitemap. Go to Settings → XML-Sitemap. The XML Sitemap plugin automatically creates a sitemap on WordPress, and you’ll see the URL at the top of the settings page.
Wrapping Up
Our checklist should help you to select the best relevant images for your blog. It’s all about consistency, quality, size, copyright, and performance!
The good news is that the compression and optimization parts can be implemented easily with Imagify. The plugin also allows you to pass several image audits on PageSpeed Insights! A free trial of Imagify is available so you can optimize images for your next article and see how your page performance improves while maintaining high-quality visuals.